July is Perfect for Dividing Bearded Iris

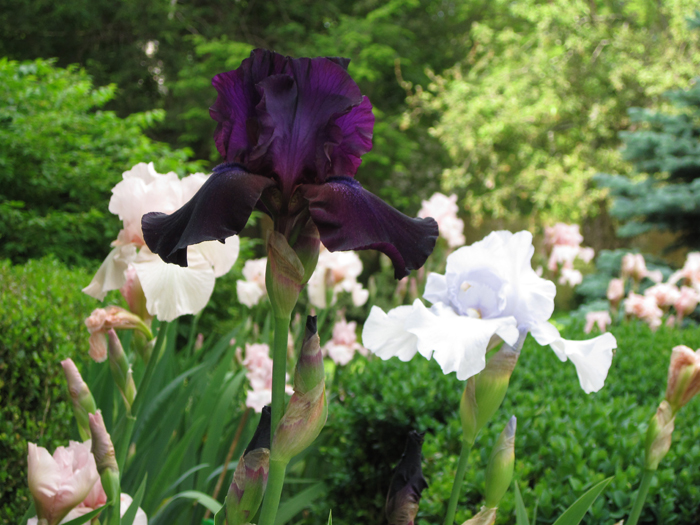
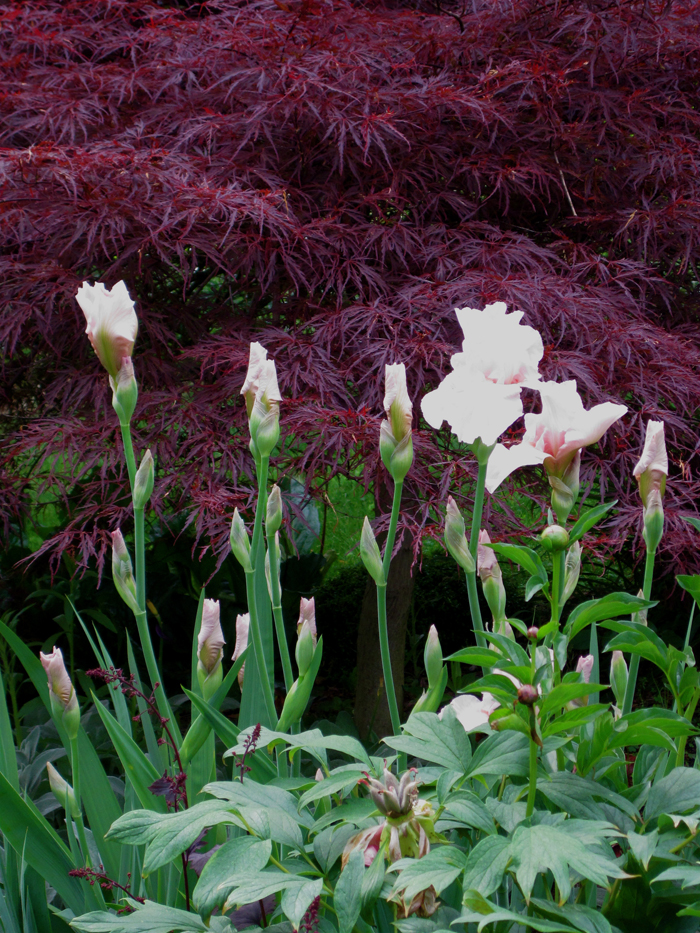
Bearded irises are relatively easy garden plants to grow, and will give good results with a minimum of care. My collection of irises came about through the generosity of a fellow gardener – an elderly gentleman from the Historical Society. We met at a Society function during my first spring in town, and found that we shared a common hobby. On a sultry, hot day in mid-summer, he dropped by with several trash bags filled with iris rhizomes. His mother had been an Iris Society member and avid collector, so the irises that he inherited and then shared with me were heirloom plants and unusual varieties. Twenty years later, their dazzling pale pink, frosty blue and midnight purple blooms light up my garden in late spring.

Here in Massachusetts, July and August are the best months of the year to plant new iris rhizomes and divide overcrowded clumps. The irises have finished flowering, and are usually dormant during the heat of the peak summer months. Iris rhizomes that are planted now have plenty of time to have their roots well established before the end of the growing season.

Bearded iris should be divided when they become overcrowded, usually after three to five years. At this point, their bloom will decline. Dividing them is not difficult, since the plants have fairly shallow root systems. I follow these steps:

1.     To divide a mature clump, carefully lift the entire plant out of the ground. I like to use a spading fork for this job, as it does not cut the roots.

2.     Next, rinse the soil off the rhizomes so that you can see any diseased areas.

3.     Separate old, exhausted, unproductive rhizomes from new, young growth.

4.     Cut off any portions that are brown inside and discard.

5.     Slice the healthy portions into chunks about 3” in length. Make sure each piece has its own roots and leaves.

6.     Prepare a planting site in full sun where the soil has excellent drainage – raised beds and slopes are ideal for this. Amend the soil with compost.

7.     Space the plants 12-24 inches apart. Clumps of three plants set in a triangle with the rhizomes facing into the center makes an attractive grouping.

8.     Lay each rhizome horizontally in its own shallow hollow. It needs to be half-buried so that the back of each rhizome is visible (like a floating whale). Tamp the roots firmly into the ground to anchor the rhizome.

9.     Trim the leaves to about 6”. This will reduce transpiration while the plant is becoming established.

10.     Keep well watered. Newly planted rhizomes need moisture for their root systems to develop. Once established, irises should be watered when the top three inches of soil dry out. Over-watering irises is a common mistake once and will lead to rot.

11.     Fertilize with superphosphate or a well-balanced fertilizer with an N-P-K ration of 10-10-10. Avoid fertilizers high in nitrogen as they encourage soft growth that is susceptible to disease.

Bearded iris are a great addition to the garden with their beautiful flowers in spring, and their bold, vertical foliage throughout the growing season. Dividing your plants regularly will keep them vigorous and healthy and provide you with years of enjoyment!


You Might Also Like

Inspiring Containers from Chanticleer

I was astounded by the beauty of the container plantings at Chanticleer Garden in Wayne, Penn.  Although it was only mid-April, there were dozens of richly planted pots throughout the garden. The containers themselves ranged from formal urns to terracotta, glazed ceramics and modern metals. Many were grouped or strategically placed to enhance the garden's design. I hope that you will be inspired to create your own artistic contained gardens!

Orange tulips, red lettuce and herbs complement the terracota pots in this courtyard garden.

Red tulips, red-twig dogwood, heuchera and euphorbia in a classic cement urn.

Grape hyacinths steal the show in this pot!

A grouping of potted shrubs, perennials and annuals in different pots that complement each other!

A quiet container water garden on the stone patio.

A vegetable garden with climbing peas on the terrace!

Another interesting grouping of potted shrubs, succulents and spring bulbs.

Pansies soften the spiky form of an agave.

Potted daffodils and tulips complement the Italian accent tiles with their lemon design.

Ranunculus, pansies, and yellow-twig dogwood in an indigo blue pot!

​A small centerpiece bowl of greens, herbs and flowers adorns the terrace dining table.

Texture Enriches the Winter Garden

When you are designing your garden for winter interest, think of yourself as a set designer. Unlike spring and summer, when the garden goes through many scene changes, the winter stage does not change rapidly. The overall composition is a static one, but it will not be boring if you incorporate the basic principles of design: form, line, color, repetition and texture.

Texture is a sensory perception of our environment, much more subliminal than color or form. During the winter, the garden loses much of its bright color and leafy abundance, so the texture of winter plants becomes much more apparent. When skies are clear, the bright, glittering winter light accentuates the textures in the landscape. Because the angle of the winter sun is low, it reflects light on the glossy foliage of large-leaved evergreens like hollies and laurels, and the shining bark of ornamental trees.

Whether peeling, patchy, shiny or dull, bark is an asset. Botanists have classified bark into 18 different types, including scaly, peeling, flaking, fissured, corky, cracked, and spiny, to name a few. Trees with outstanding peeling bark include the Paperbark maple, River birch, Paper birch, and Shagbark hickory.

Sargent cherry (below) is a stunner with its glossy, burgundy striped bark. Other trees with shiny, colorful bark include Japanese maples and the Prairiefire crabapple.

Stewartias (below) and Kousa dogwoods display patchy bark in camouflage colors. These ornamental trees look best sited against a backdrop of evergreens, which will help to show off their interesting bark.

Evergreen trees and shrubs provide textures with their leaves and needles, and planting evergreens with contrasting textures creates interesting compositions. The large smooth leaves of a rhododendron can be set off with the ferny foliage of Siberian cypress and the fine texture of a boxwood. The soft long needles of an Austrian pine look great next to the shiny, spiky leaves of a blue holly.

Evergreen groundcovers add texture at ground level and perk up the garden when the lawn has turned to a depressing brown. Excellent groundcovers for winter interest include broadleaf evergreens such as pachysandra, vinca, euonymous, or gaultheria, and low-growing conifers such as ‘Nana’ or ‘Blue Star’ junipers.

Although many gardeners like to deadhead spent flowers in the fall, dried blooms and seedheads of sedums, astilbes, black-eyed susans and ornamental grasses enrich the winter landscape. The dried flowers of hydrangeas, pieris and leucothoe also add a nice texture to the garden, and look particularly beautiful when dusted with snow.

Berries, fruits and hips are like exclamation points in the landscape. The fruits of a hawthorn tree, the berries of cotoneasters, hollies and junipers, or the hips of a climbing rose add a delightful texture, especially when covered with frost.

Texture in the garden is most visible and effective when seen in contrast: lustrous with dull, prickly with smooth, ribbed with flat, feathery with broad, needled with flat. As the “set designer” of your garden, you can create a beautiful winter scene with the endless variety of textures exhibited by our trees, shrubs and herbaceous plants.

Homemade Deer Repellents

Many of our gardening friends and clients ask for advice on keeping deer away from their gardens. In addition to commercial products such as Deer Off and Milorganite fertilizer, we have received these two tips for home made repellents from fellow garden club members:

Hot & Stinky Deer Repellent

Puree in blender until as thin and smooth as possible:

3 T. or more minced garlic

3 T. hot sauce

3 eggs

Pour into a gallon bottle

Add:

12 oz Wilt-Pruf concentrate (available at Walmart, garden supply or hardware stores)

Add water to fill the gallon jug.

Let sit one day.

Shake before using. Apply directly to plants with watering can or a spraybottle. You may have to enlarge the holes. The Wilt-Pruf makes it rain- and deer-resistant for months.


Egg Deer Repellent

Another friend swears by this simpler version:

Beat 2 eggs and place in a gallon jug with another water to fill the jug. Let sit one day.

Pour or spray on to plants.

The repellent lasts for several weeks.