Gardening in March: 10 Things You Can Do to Prepare for Spring

With temperatures climbing this week, the feeling of spring is in the air. While I know that true spring is still a ways off, the desire to get outside and work in the garden is getting strong. Luckily, there are a few garden tasks that should be done now, before the soil warms up, the trees leaf out, and the rapid growth of bulbs and perennials begins.

1. Prune deciduous trees and shrubs

Late winter is prime pruning time for deciduous trees and shrubs, while they are still dormant. Always use sharp tools to make clean cuts, and let the wounds heal naturally. Remove dead, damaged, or diseased wood, suckers and water sprouts. This is the ideal time to prune fruit trees and summer-blooming shrubs such as weigela, butterfly bush, redtwig dogwood, and spireas.

2. Pamper discolored evergreens

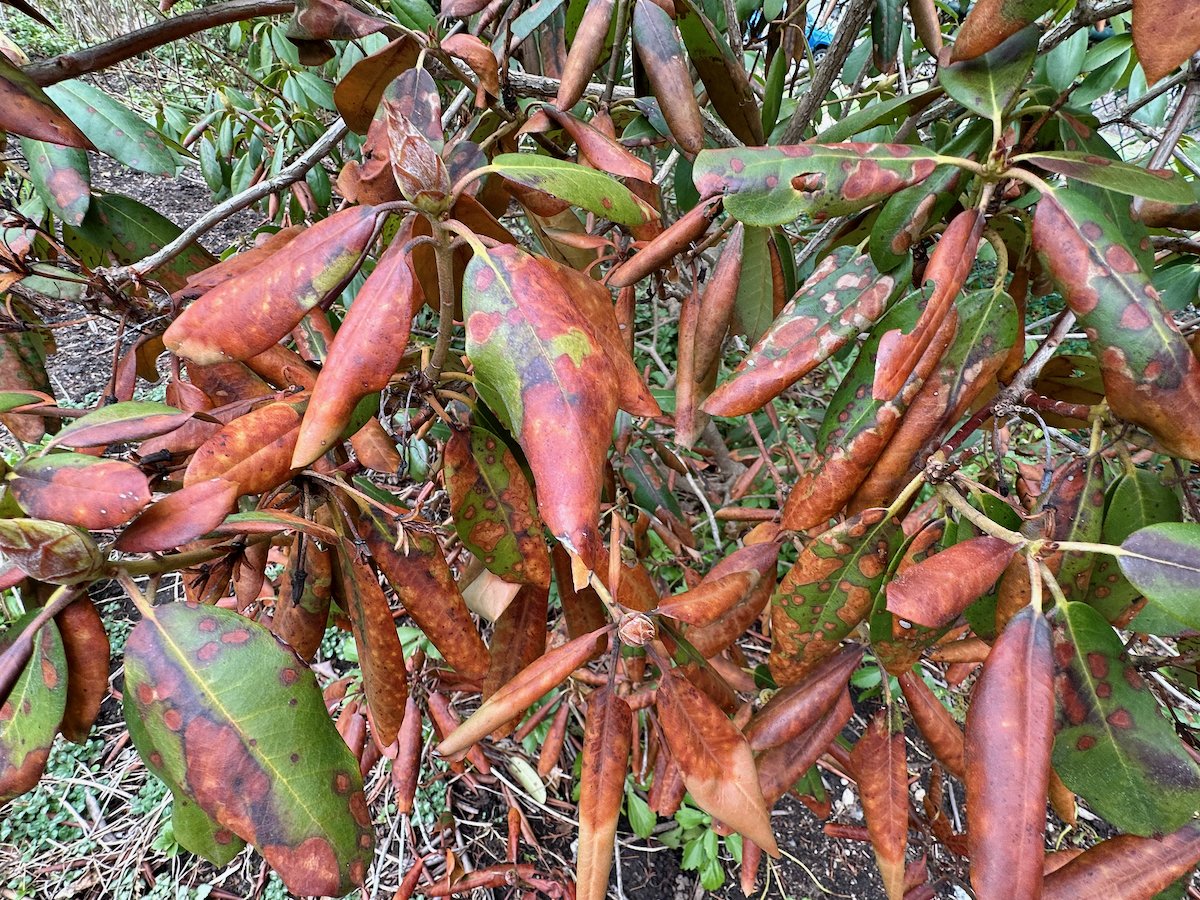
Evergreen foliage may become brown or bleached during winter due to excessive transpiration, sun exposure, or cold temperatures in early fall. Injured plants should be fertilized in early spring and watered well throughout the season. It’s best to wait until mid-spring before pruning out injured foliage. Although brown foliage is most likely dead, the buds, which are more cold-hardy than foliage, will often grow and fill in the shrub. If the buds have not survived, prune dead branches back to living tissue.

img_2640.jpg

3. Remedy snow and ice damage on multi-leader trees

Heavy snow and ice storms cause damage by bending and breaking branches. Multiple leader, upright evergreens, such as arborvitae and juniper, and multiple leader or clump trees, such as birch, are most subject to snow and ice damage. Small trees can be temporarily wrapped together or the leaders tied with strips of strong cloth or nylon stockings to correct the splaying that occurs in winter. Large multi-stemmed trees should be cabled together by a professional arborist.

4. Prune hydrangeas

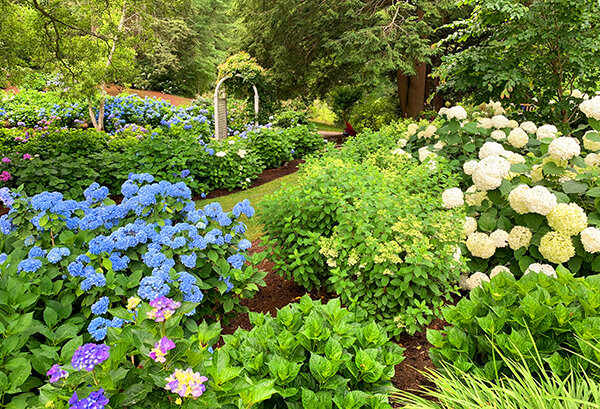
I like to leave most of my hydrangea blooms for winter interest in the garden, but now is the time to prepare the shrubs for spring growth. I carefully remove any dead branches from all my plants, cutting down gradually on each stalk to make sure that I don't remove a branch that looks dead, but is green half way down the stem. I reduce my mature paniculata hydrangeas to about half their height to keep them in scale with their garden location. My hedge of ‘Annabelle’ hydrangeas is cut back to 2’ in height. This keeps the hedge at a compact height, and the plants produce stronger stems to hold up those giant white mopheads. My ‘Endless Summer’ hydrangeas receive a very light pruning to remove the dried flowers and restore a rounded shape.

5. Trim roses and remove winter mulch

Winter pruning should be done when the season begins to warm up and the small buds begin to swell. It is best to wait until the worst of the frosts have passed - early April in Massachusetts. I remove any dead or weak stems and last year’s flower buds, and reduce shrub roses to about half their size, aiming to create a nice rounded shrub. I also gradually remove my winter mulch of compost or shredded leaves.

6. Prune Group 3 (or Type C) clematis

These are the summer blooming varieties such as the viticellas, Jackmanii types, texensis, the herbaceous species such as integrifolia and recta that bloom on new wood and the late bloomers such as Sweet Autumn Clematis (C. terniflora) and orientalis types. Clematis in Group 3 mainly flower on new wood produced in the current year and should be pruned back severely every year in late winter, when they are completely dormant, to about 12 - 14 inches. Leave at least two pairs of buds (4) on each stem of the plant. Most Group 3s are very fast growing and will reach their full height before blooming every summer. If you fail to prune these, they will develop long 'legs' that get woody and will be devoid of foliage and blooms.

7. Cut back ornamental grasses

I like the look of ornamental grasses in early winter, but by late January, they have collapsed into a mess of tangled stalks. This is a great time to clean up the grasses before new shoots appear in the spring.

8. Cut back foliage of persistent perennials

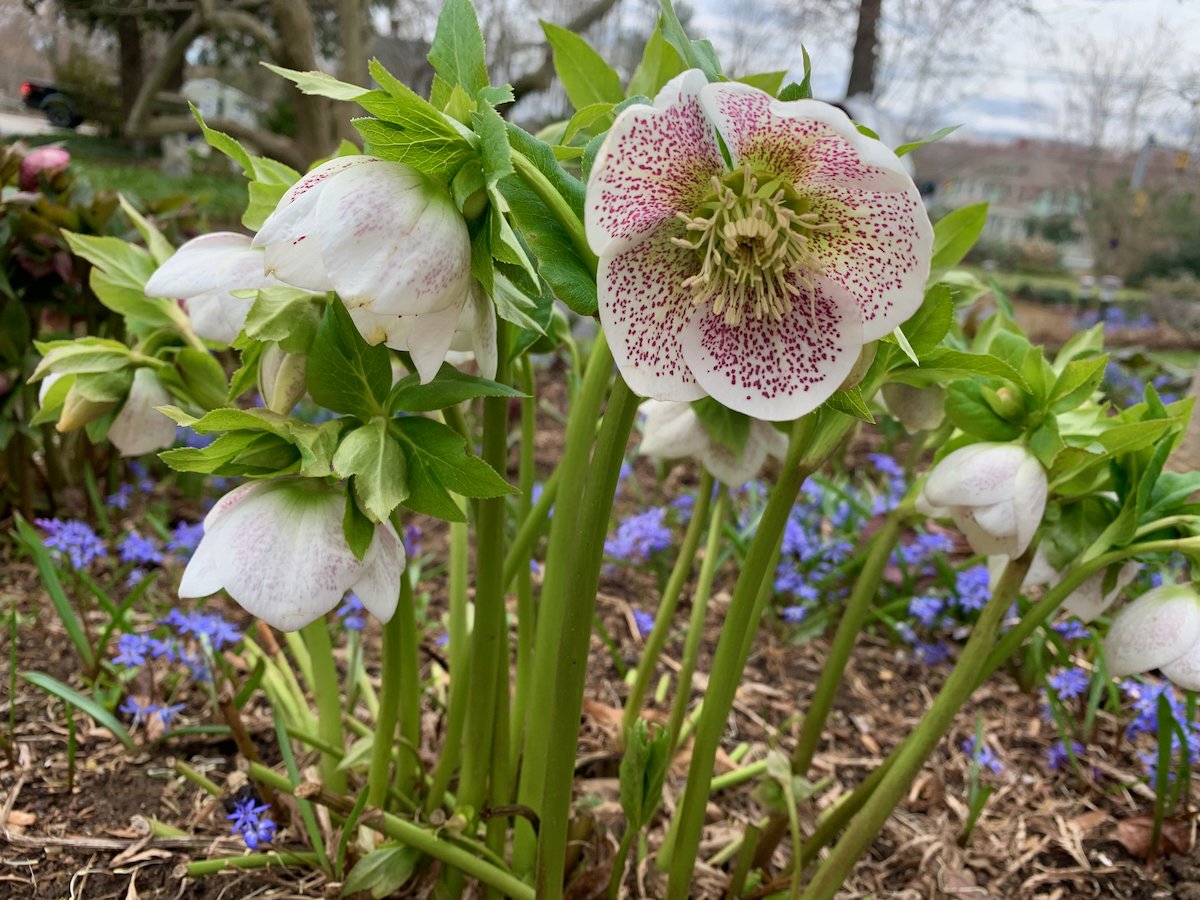
Perennials with evergreen foliage, such as hellebores, epimediums, and ginger will soon start sending out new growth or flowers. Late winter is a great time to remove last year’s tattered foliage without harming the emerging new shoots or flower buds. To fully enjoy the blooms of your Orientalis hellebores, make sure that you remove all of last year’s foliage. Hellebore Foetidus grows as a single stalk, so should NOT be trimmed in this way.

9. Replant heaved plants

The freezing/thawing cycles of early spring sometimes lift entire small plants out of the ground. Check your garden for any heaved perennials and gently replant and water them as soon as possible. Heucheras, astrantias and newly planted perennials are susceptible to heaving. A layer of winter mulch or evergreen bows remedies this problem by keeping the soil at a more even temperature through the winter.

10. Feed spring bulbs

Spring bulbs will benefit with a dose of an all-natural organic fertilizer as their green tips push through the ground.

Japanese Umbrella Pine: A Living Fossil for the Winter Garden

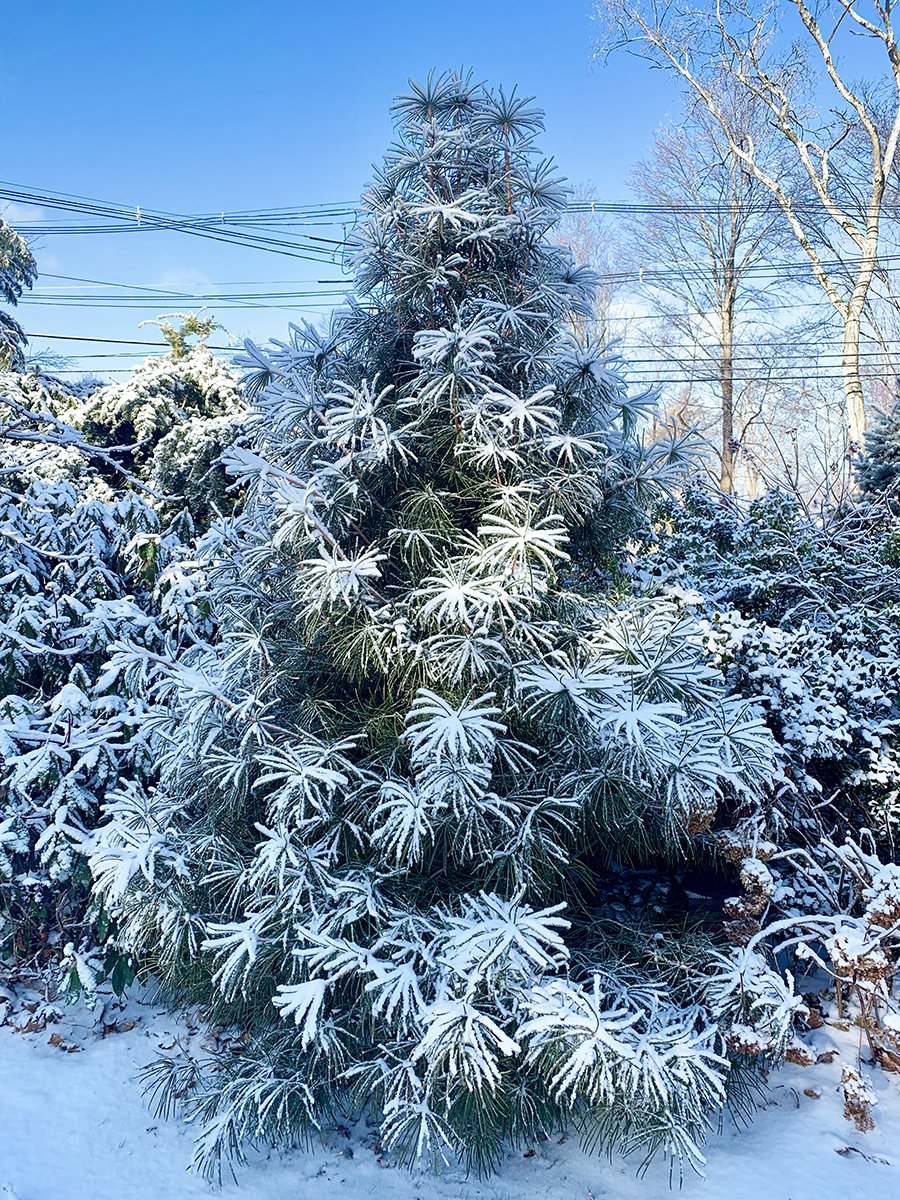
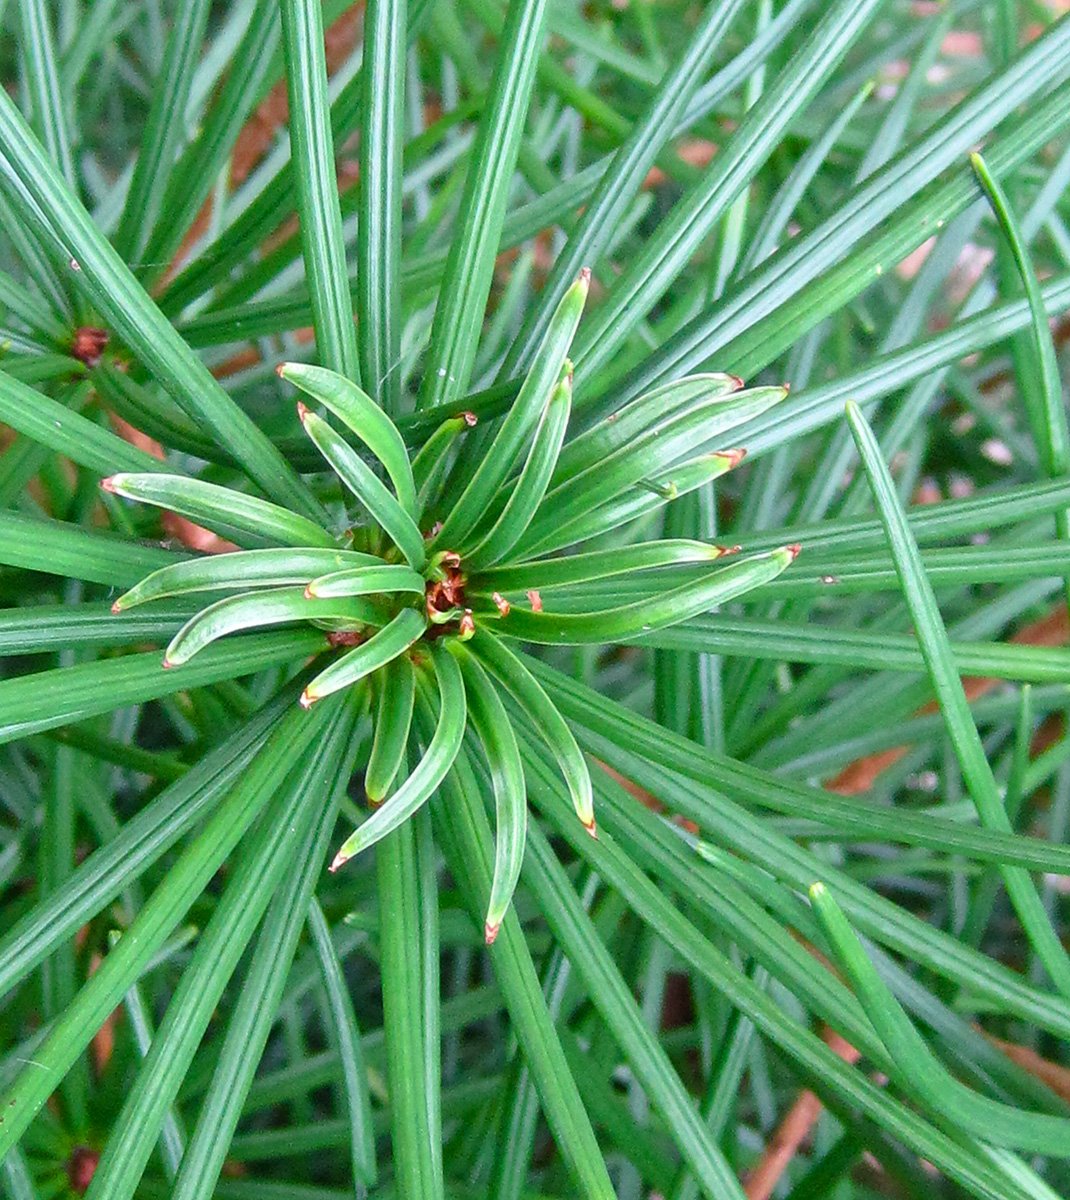
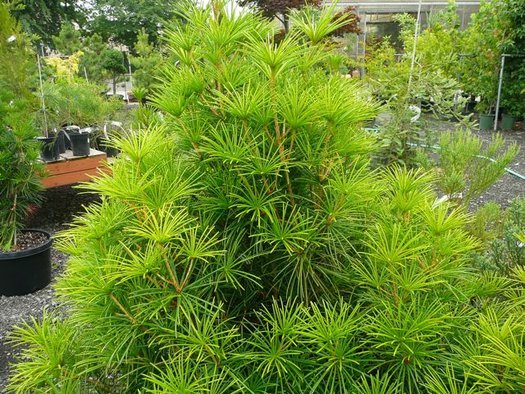
One of the most beautiful evergreens for the winter garden is the Japanese Umbrella Pine (Sciadopitys verticillata), a slow-growing specimen that always attracts attention. It is an elegant conifer with long, thick, lustrous needles and a fascinating history.

The Umbrella Pine is actually not a pine at all.  It is a coniferous evergreen that is now classified in its own family, the Sciadopitaceae. The Umbrella Pine can be traced to the Triassic period, some 250 million years ago, when the continents were joined and much of North America was near the Equator. At that time, the Japanese Umbrella Pine and its then-numerous relatives flourished in what is now Eurasia, northern Europe and northern North America. But as the continents moved and flowering plants replaced conifers, the Umbrella Pine’s range and species diversification shrank. Today, this once successful family is reduced to just one species growing in the cool cloud forests of central Japan at elevations of 1,500-3,000 feet.

Enthusiasts and collectors of unusual and historical specimens consider the Umbrella Pine a “living fossil”. A living fossil is any living species of plant or animal with no known close relatives outside of the fossil record. Growing a living fossil in the home garden is one way to help preserve rare or endangered plant species since it increases their geographic range. Other trees that are considered “living fossils” include the ginkgo (Ginkgo biloba), Dawn Redwood (Metasequoia), and Monkey Puzzle Tree (Araucaria araucana). For more examples of living fossils, visit the Arboretum at Dinosaur State Park in Rocky Hill, Conn., which displays more than 250 species and cultivars of trees and shrubs from the Dinosaur Age.

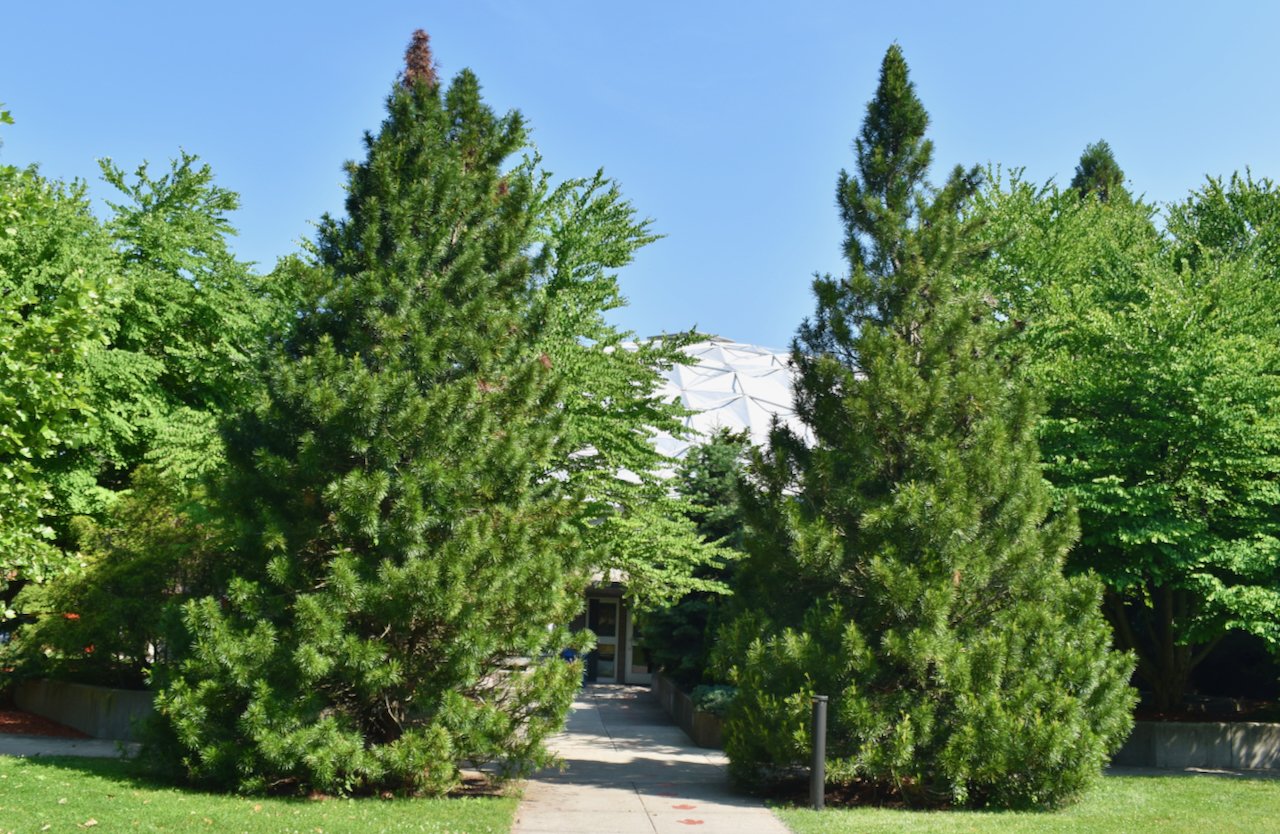
Japanese umbrella pines frame the entrance to the dinosaur state park in rocky hill, Ct.

Francis Parkman, a Boston historian with a passion for gardening, was the first to grow this conifer outside Japan.  In 1861, he was sent the first Umbrella Pine - along with the first Japanese maples to be grown in America - by George Hall, an Oriental trader. Parkman named this unusual conifer Japanese Umbrella Pine because the whorl of stiff flattened needles at the end of each shoot resembles the spokes of a Japanese umbrella.

Although the Umbrella Pine has a narrow growing range (Zones 5-7), it is an ideal tree for much of New England. It enjoys moist, acidic, well-drained soil, full to part sun, a sheltered location, and is not subject to diseases or pests. In nature, it grows as a 120-foot tall tree with a dense, symmetrical growth habit and reddish-brown bark that exfoliates in shreds. In the garden, it is very slow growing - often making only 6 inches of growth a year to a height of 25-40 feet. The luxuriantly rich evergreen needles are 2 to 5 inches long.

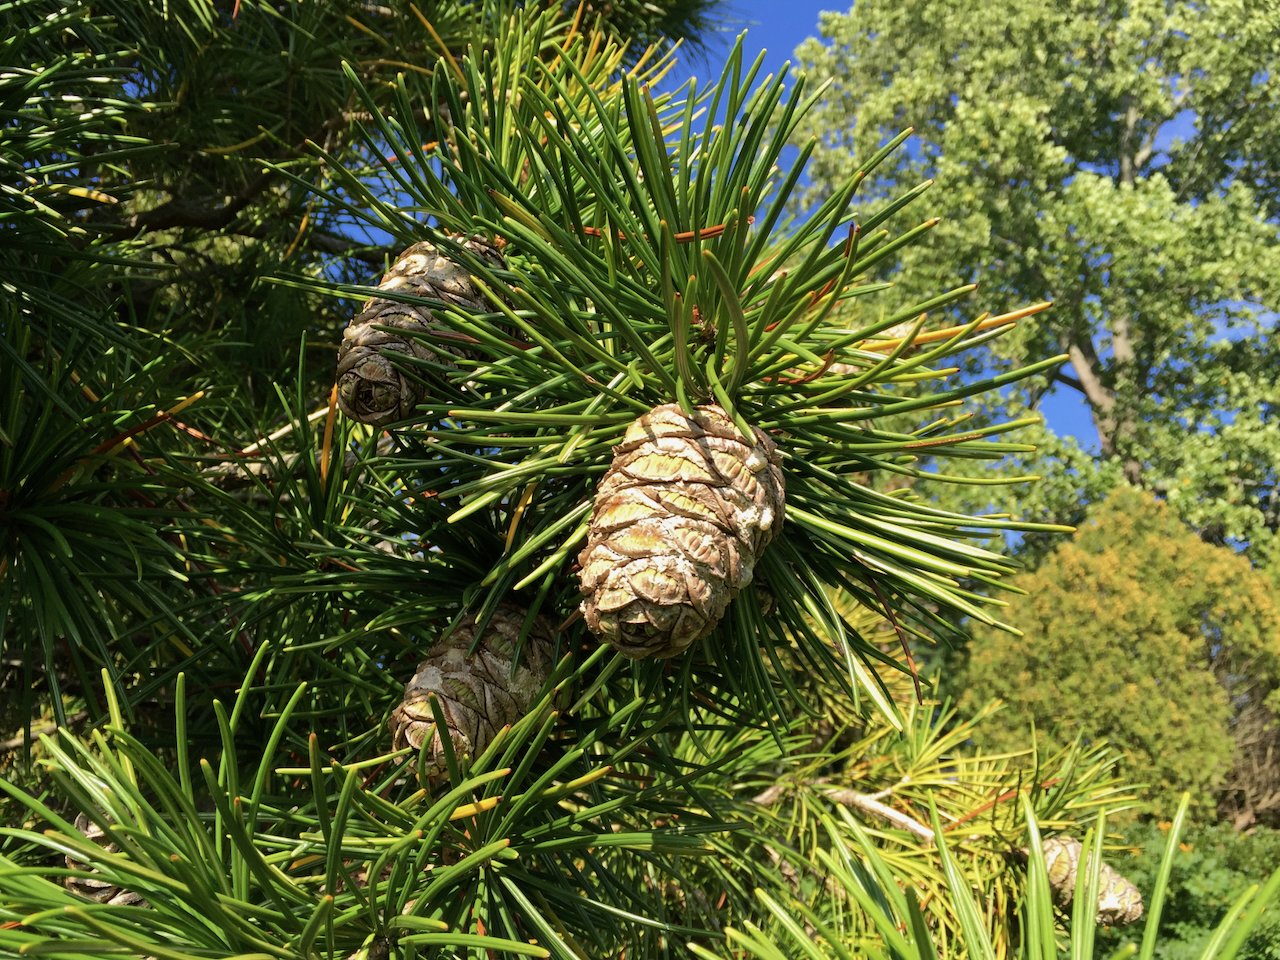
As the tree ages, 3- to 6-inch-long oval-shaped, brown pine cones will appear. Even the pine cones are slow growing – they take almost two years to mature after pollination. Because of its slow growth rate, the Umbrella Pine can be used in rock gardens. It makes a unique addition to the home landscape as a specimen or lawn tree, or even as part of a foundation planting. Attractive, unusual, but somewhat pricey, this long-lived conifer will be a prominent focal point in any garden setting.

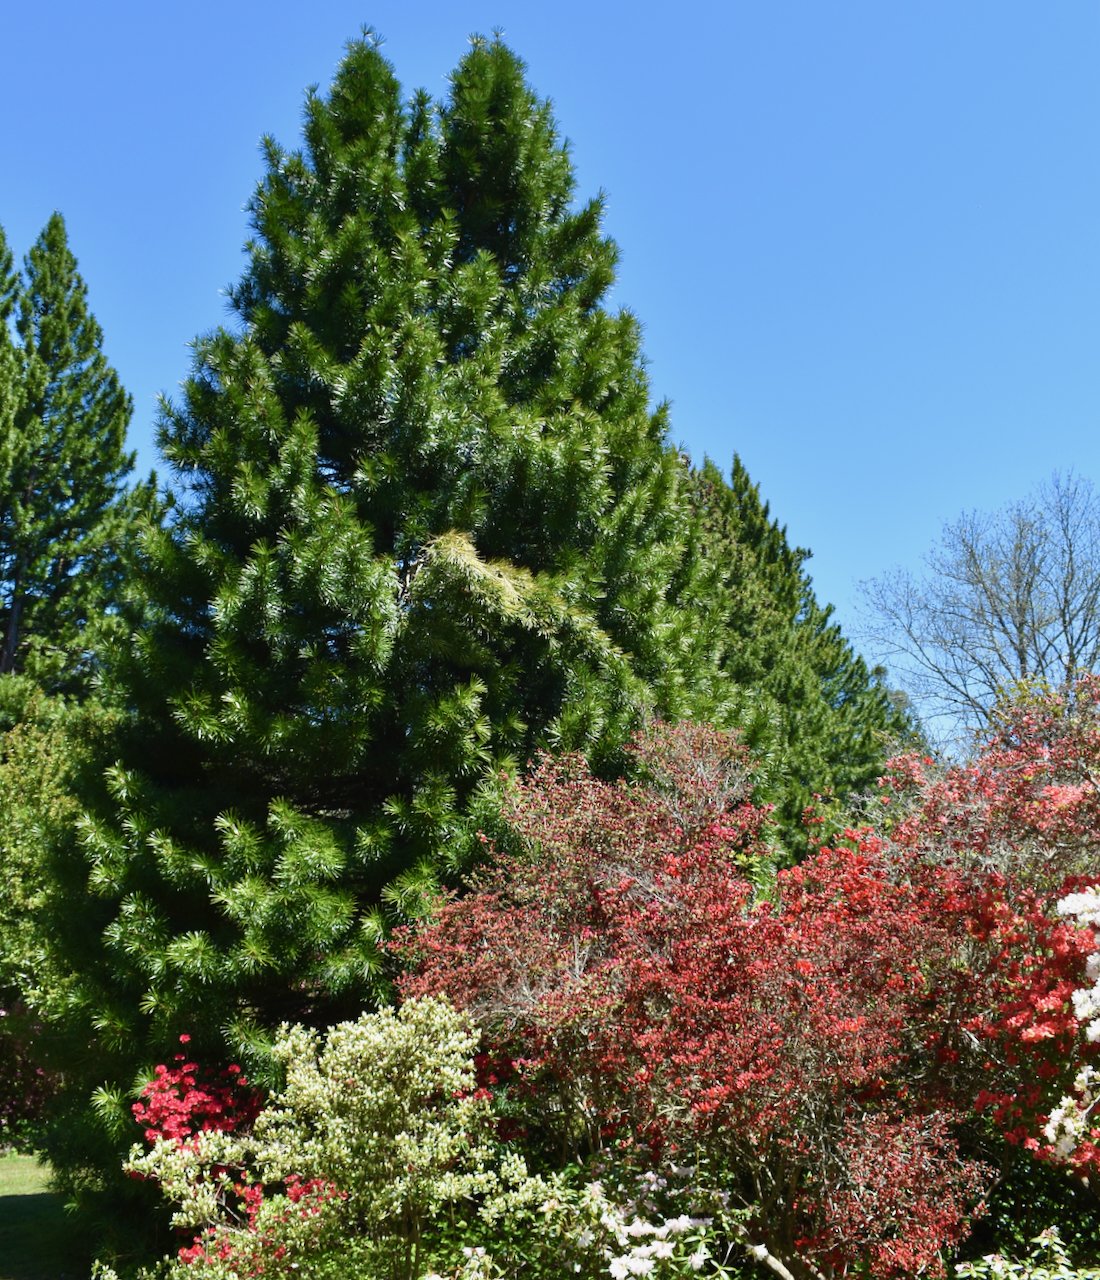
Japanese umbrella pines frame a collection of azaleas at the kinney azalea Garden

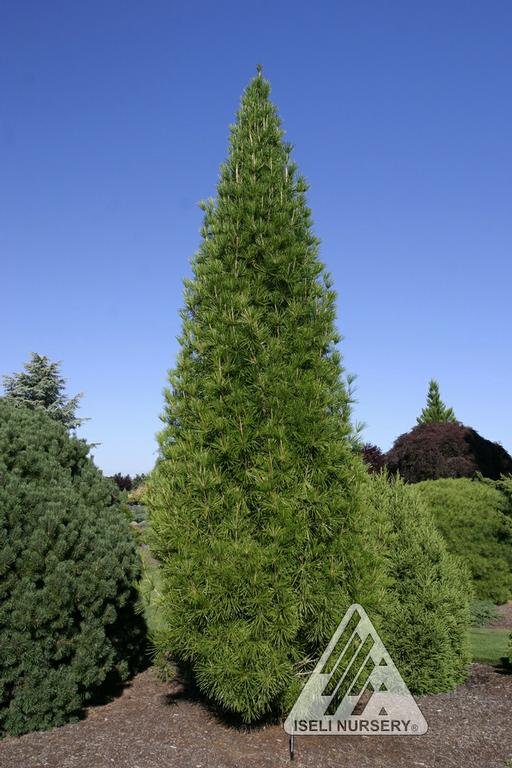
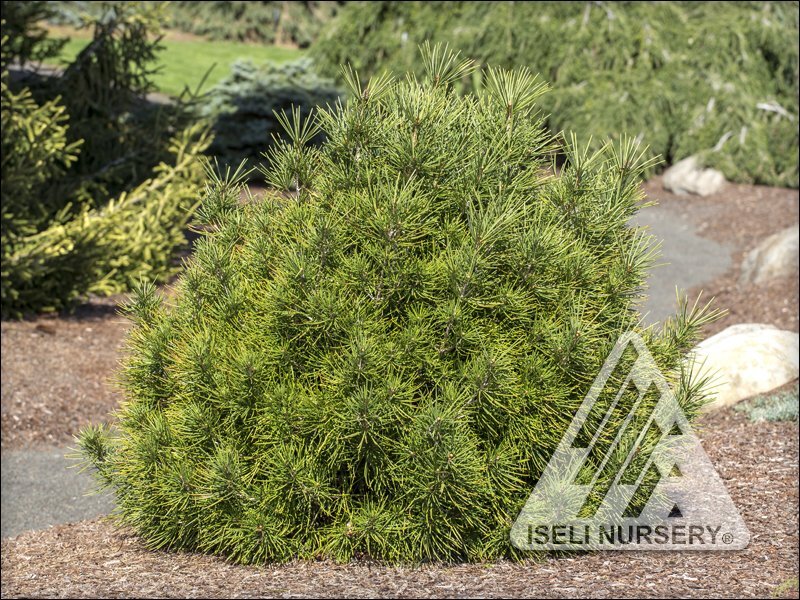
New cultivars from Iseli Nursery include ‘Joey Cozy’, an upright, narrow variety that grows to 20’ high and withstands snow load due to its shorter branches. ‘Picola’ is a dwarf variety which grows to 4’, and ‘Richie’ grows to only 12’ high and features yellow spring growth.


Winter Pruning Tips

IMG_8716.JPG

By Jen Kettell |Radiant Leaf Consulting

There are those winter days when the air is so deeply cold that it nearly takes your breath away. On many winter days, though, the sky is a deep blue expanse around the bright sun, and the crisp air cleanses with each breath. On those days, I eagerly gear up in several warm layers and grab my coffee mug for the drive to share hands-on pruning lessons with my clients. Winter work in horticulture is very different from the growing-season madness. It’s quieter, strategic, and when it comes to pruning – more efficient. 

Pruning, it has been said many times, is both an art and a science. This is likely why I fell in love with arboriculture and pruning techniques. Pruning is not simply cutting any branches any where to make a plant smaller. True pruning technique requires an artist’s eye to sculpt a woody plant (tree, shrub, or vine) into a beautiful form that maintains its natural, species-driven habit. It also requires a scientist’s understanding of plant biology and mechanics to increase its strength and guide future growth. Pruning is a necessary task in caring for our landscapes. Most importantly, skilled pruning increases the health and lifespan of our urban canopy - keeping us healthy!

Photo by Sara Maida

Photo by Sara Maida

Getting started

Before beginning your next pruning project, take a moment to inspect your tools. By using a sharp pair of bypass pruners and a professional-grade pruning saw, you can easily and precisely prune away unwanted branches. Be sure to always wear safety glasses and gloves, too. (Stay safe by knowing your limits! Find a professional arborist here.)

By winter, deciduous trees and shrubs have shed their leaves to reveal their underlying architecture. Believe it or not, you should spend as much time looking and assessing as you do actively cutting branches. Think about what your goals are prior to making that first cut. Are there branches reaching over the driveway that need to be shortened? Does the plant only need some light shaping?

Next, start scouting for the kinds of branches you’ll consider removing. Prune away all dead branches any time of year, regardless of plant species. Dead branches don’t come back, and no longer serve your plants. Look for broken and crossing branches. From now through March, these branches are much easier to spot than when they are full of foliage. Stand back and look again. Things are looking better already! There’s much more to cover than a blog post allows, so please download my short guide here!

Photo by Sara Maida

Photo by Sara Maida

Timing

I often hear great concern over the timing of pruning, especially about plants that set their flower buds on old wood (download a handy list here). As I’ve said many times before, I will go to my grave - hand pruners held high – hollering, “HOW you prune is more important than WHEN you prune!”

What?! Why, you ask? 

The short answer…because pruning is pruning and hedging is hedging.

Through natural, selective pruning, we’re carefully selecting specific branches for removal; we are not giving a buzz cut.  While we’ll certainly remove flower buds via the cut branches, we won’t have denuded the whole plant. So, if you’re contemplating that tiny lilac you planted just last year, maybe hold off on pruning until right after flowering. However, for that lilac that hasn’t seen a sharp saw in twenty years? Prune.It.Now

Are there plants that I never prune in winter? Absolutely! Here are a couple that come to mind: roses (Rosa spp.), big leaf hydrangeas (Hydrangea macrophylla), and dieback shrubs like Russian sage (Perovskia atriplicifolia).

Photo by Sara Maida

Photo by Sara Maida

Practice

Pruning skills are only honed by practicing pruning—so bundle up! Sharpen those tools and start tackling your garden favorites. Once you get in the groove, I know you’ll catch pruning fever!

Join me for my next webinar hosted by the Massachusetts Horticultural Society: https://radiantleaf.com/thisseason

 To learn more: Jen Kettell |Radiant Leaf Consulting Radiantleaf.com jen@radiantleaf.com

Photo by Sara Maida

Photo by Sara Maida

More Hellebores, Please!

Hellebores have become one of my favorite plants since I began growing them about 10 years ago. They bloom at a time when the garden is mostly dormant - from late fall to early spring - and bring a smile to my face every time I see them bravely holding up their blossoms against the harsh weather. They are easy to grow, virtually care-free, and there are wonderful new varieties introduced every year.

This hellebore Niger began blooming in early December due to our warm winter this year.

This hellebore Niger began blooming in early December due to our warm winter this year.

Hybrid hellebores are expensive to purchase (about $17 for a one-gallon pot) because it takes three to five years for them to bloom, and growers generally only sell blooming plants. You can buy smaller plants through mail order. But the most economical way to increase your collection is to propagate your own plants. You can divide all hellebores except the caulescent varieties (H. argutifolius, H. livius and H. foetidus).

Unlike other perennials, hellebores are long-lived plants that do not need to be divided to remain vigorous. In researching hellebore division, I have found a range of recommendations as to when to divide your hellebores - from dividing them in early spring, to mid spring while they are still in bloom, to waiting until mid-summer, to early fall (September to October). Since opinions on this vary so widely, I think that it is safe to do the division in any of these seasons. I have done it successfully in early summer, while the flowers were still visible on the plant, but after their beautiful display in early spring. The keys to successful division seem to be:

  1. Make sure that there are flower buds in each division
  2. Divisions should not be allowed to dry out after replanting
  3. Divisions should have enough time to establish a healthy root system before winter 

To divide a hellebore, dig up the entire plant, wash the crown free of soil in order to better see what you are doing, and then cut between the growth buds with a sharp knife. Try to leave at least three buds in each division so that the plants will recover quickly.

For your first experience, select a plant that has 5-10 flowers on it. Older plants are very woody in their center. Make sure that you have a very sharp knife. I keep a small pruning saw with a serrated blade just for the purpose of dividing perennials. Make sure that each division has a portion of the center along with the newer growth from the edge of the plant. 

Plant your divisions in full shade to almost full sun. Add compost to the planting hole, firmly tamp down the soil, water, and mulch. I also water with a high-phosphorous fertilizer to encourage good rooting. Divisions should be kept moist throughout their first growing season until frost.

One of my hellebore gardens with divisions from my own plants.

One of my hellebore gardens with divisions from my own plants.

Another way to add hellebores to your collection is to grow on any seedlings that have rooted around the mother plant. Not all hellebores produce seeds - some are sterile hybrids. But many of the orientalis type do set seed every year, and if you look carefully, you will see little seedlings growing around the mother plant. These seedlings should be moved to a nursery location after they have developed a true set of leaves, so that they will not be shaded out by the mature plants. I grow them on for about two years in a nursery bed, and then plant them out in the garden, eager to see what these babies will look like when they bloom.

Seedlings with fully formed leaves at the base of the mother plants.

Seedlings with fully formed leaves at the base of the mother plants.

Two-year old seedlings in the nursery bed where they enjoy beautiful soil and no competition from other plants.

Two-year old seedlings in the nursery bed where they enjoy beautiful soil and no competition from other plants.

Hellebore foetidus produces many seedlings in my garden, and I find them in random places where they have planted themselves. Since foetidus is not a long-lived plant, you should keep some seedling growing by the mother plant so that you continue to have hellebores in that spot. Because they have finely cut foliage, these hellebores do not shade out their babies.

Hellebore foetidus seedlings

Hellebore foetidus seedlings

I have so enjoyed slowly collecting new cultivars, dividing my plants and growing on hellebores from seed, that I now have about 50 hellebore plants throughout my garden. And when I see them blooming every winter, I know that I will add more!

New Hellebores available to purchase this year

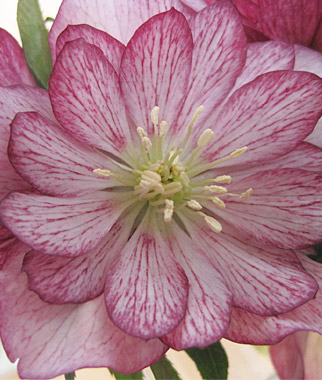
(From top left): Berry Swirl (Plant Delights), Cotton Candy (Plant Delights), Honeymoon Rome in Red (White Flower Farm), Honeymoon Sandy Shores (White Flower Farm), Double Ellen White (White Flower Farm), Love Bug (Pine Knot Farms), Mango Magic (Broken Arrow), Tutu (Pine Knot Farms)

Sources: White Flower Farm, Pine Knot Farms, Plant Delights, Broken Arrow


Tips for Winter Pots

As the temperatures drop and the garden tucks in for its winter slumber, containers step out of their supporting roles to take a star turn in the garden. Here are a few tips and inspiration photos for creating beautiful winter pots.

Jazz up your winter landscape with pots, hanging baskets and window boxes planted with evergreens or overflowing with assorted cuttings from conifers, berries, seed heads and dried flowers.

You can plant pots for winter interest as long as the plants are hardier than your growing zone. Here, early blooming snowdrops surround a planted red-twig dogwood. Black mondo grass adds the beautiful texture and dark color. Planted pots need good drainage in the winter, which is provided with this brick and pebble patio. If you site them on the driveway or other solid hardscape, elevate the pots with pot feet or bricks to let excess water drain out eaily.

Don’t be stingy with your outdoor containers! Empty urns just draw attention to what is missing.

Beautiful winter arrangements are not just for the holidays. You can use a combination of living and cut plants to dress up your pots from late fall through late winter.

Hanging baskets lined with moss are gorgeous when decorated with cut evergreens.

The same plants that bring interest to the winter landscape bring pizzaz to winter containers,  such as the red-twig dogwood pictured here.

Remember to keep your containers in scale with their environment. Most homeowners select a container that’s too small for their space.

If you live in a townhouse and condo, winter containers are a perfect "gardening outlet". These winter pots combine abundance and whimsy with their magnolia leaves, fruits, cones, dried hydrangeas, and a twig reindeer head.

Branches provide height, visual weight and texture for your containers. Birch, red twig dogwood, golden willow and harry's lauder's walking stick are particularly decorative.

Here twig balls add a whimsical flair.

By combining many different types of evergreens, you can achieve a rich "tapestry" look of contrasting textures in various shades of green.

Simple modern pots set off classic boxwoods and a voluptuous evergreen arrangement. 

Elevating your pots makes them more prominent. Here a formally centered classic urn on a plinth creates a beautiful front entrance.

ith a big snowstorm in the forecast on the day before Thanksgiving, I quickly ran through the garden with pruning shears to fill the 7 urns around my house. Yews, hollies, golden cypresses, leucothoe and winterberry holly received their annual trimming as I filled up my pots. What a great way to spend a few hours out in the winter garden!


Gardening in the Hellstrip

The hellstrip — the space between a street and a public sidewalk, also known as a tree park, boulevard, meridian, and planting strip — is getting a lot of attention these days with the publication of Evelyn Hadden’s Hellstrip Gardening by Timber Press. This comprehensive guide with gorgeous color photographs of hellstrip gardens across the country offers inspiration and visual guidance to anyone ready to tackle this final frontier.

Hellstrip gardening is nothing new to my friend Kathy, who has been adding curb appeal to her home with hellstrip plantings for 15 years. Kathy began her roadside garden when she got tired of trying to keep the lawn grass alive in the hellstrip year after year. Always keen on water conservation, Kathy wanted a low maintenance solution for this long, sunny expanse. Her large backyard garden had also become shaded over the years as the pine trees grew taller and taller, so the sunny hellstrip offered a chance to relocate her sun lovers from the backyard and to try some new plants in this totally different environment.

She began the garden by digging up a small section of sod around her mailbox, amending the soil, and planting various sedums that would be low maintenance and drought resistant. Bit by bit, the hellstrip garden grew, and then expanded to the other side of the driveway. Now it measures close to 100 feet, and boasts a wide variety of perennials. Kathy learned through trial and error which plants to grow, and which plants to avoid. Some perennials, like yarrows, were too tall and floppy. Annuals were too labor intensive, except for the portulaca that self sows and returns year after year. But there were many perennials that acclimated to this dry, sunny area with its relatively poor soil.

Mediterranean plants and herbs – many of which sport silver foliage and prefer a sunny situation with lean soil and good drainage, thrive in Kathy’s roadside garden. Sedums, Lamb’s ears, salvia, sage, alliums, fescues, rosemary, thyme, mint, sea lavender, and catmint bask in the baking hot sun. The garden delights passersby with a changing palette of blooms and foliage. In the early spring, crocus, creeping phlox and species tulips, which love the good drainage, cheer up the border with their blooms. They are followed by stately bearded irises, columbines and poppies in June, and daylilies, helianthus and coreopsis in mid summer. A prickly pear cactus at the base of the mailbox surprises visitors with its yellow flowers in July. Sedums steal the show in August. In a shadier part of the garden, hostas and heucheras provided beautiful foliage from spring to fall.

Gardening in the hellstrip has its challenges. The soil in these areas is usually cheap, compacted fill. Kathy amends it at planting time with compost, and has been top dressing with leaf mulch. Because of the distance from the house, the garden is difficult to water. Although Kathy does not irrigate regularly, newly installed plants need supplemental watering, which amounts to many trips with a watering can. Weeds easily blow into the garden and crabgrass is a particular problem. Since the hellstrip is town-owned property, large sections have been dug up utility companies several times without prior notice.

But overall, gardening in the hellstrip has been a positive experience for Kathy. Neighbors stop by to admire the garden, and Kathy receives many compliments on sprucing up the neighborhood. “The hellstrip builds community,” says Kathy. “People stop by to chat and ask about the flowers. And it gives me a chance to try plants that I couldn’t grow anywhere else in my garden.”

Blue Star Glitters in the Winter Landscape

inter is the season when conifers really come into their own in the garden. They provide much needed structure, form, texture and color at a time when the landscape can look so bleak. One of my favorite conifers for year-round interest is the “Blue Star” juniper, a slow-growing dwarf evergreen shrub with an intense silver-blue hue.

When you mention junipers to a gardener, the name often conjures up images of a sea of boring groundcover in the mall parking lot. A self-described “plantaholic” friend of mine was recently looking for plants for a large sunny slope that she had just cleared. She needed plants that would hold the soil, tolerate sun without supplemental watering, and require minimal pampering on this steep terrain. When I suggested the Blue Star juniper, she looked at me with disbelief. What does a juniper have to offer the experienced plant collector?

Junipers are not all the same, however, and as with other plant species, there are many new cultivars available to the home gardener. I have come to love “Blue Star” juniper in my own garden because its intense blue color complements so many plants. For a striking color contrast of opposites on the color wheel, you can plant this juniper with gold threadleaf cypress or other gold colored plants.

In my own garden, I use ‘Blue Star’ in the sunny beds around my home, where a color palette of blues, silvers, purples and pinks complements my blue-gray house. Blue Star looks fabulous with deep pink azaleas and Geranium sanguineum, alongside the variegated Euonymous ‘Gaiety’ and fuzzy Lambs Ears, at the base of my bright blue ‘Endless Summer’ hydrangeas and intereplanted with Heuchera ‘Silver Scrolls’ in an area of partial shade. The key is in the plant “marriages”, and Blue Star is the perfect companion for so many perennials and shrubs!

Blue Star juniper (Juniperus squamata ‘Blue Star’) is slow-growing and has a low, mounded habit. It grows only to about 1 foot tall in five years, but will eventually mature to 2-3’ high. Its dense, awl-shaped foliage provides an interesting texture in the garden. The upper silver-blue surfaces of the leaves add brilliant color and a star-like sparkle. It is commonly called “singleseed juniper” because each bluish, berry-like, female cone contains but a single seed. Like other junipers, it is cold-hardy, thrives in full sun to part shade, and requires good drainage. Once established, this shrub tolerates droughts, and dry, shallow rocky soil. Horticulturalist and conifer collector Adrian Bloom calls Blue Star “arguably the best dwarf conifer ever raised.”

Blue Star’s dwarf size and neat appearance make it an ideal shrub for foundation plantings and small gardens. It is perfect for the front of a shrub border, in rock gardens, or showcased as a focal point plant to be admired for its color and shape. It also provides erosion control on slopes. It's a no-maintenance evergreen ground cover for sunny areas and a well-behaved companion that will not invade and overpower its neighbors. And for those of us in northern climates, Blue Star provides beautiful foliage that glitters in the winter garden.

Texture Enriches the Winter Garden

When you are designing your garden for winter interest, think of yourself as a set designer. Unlike spring and summer, when the garden goes through many scene changes, the winter stage does not change rapidly. The overall composition is a static one, but it will not be boring if you incorporate the basic principles of design: form, line, color, repetition and texture.

Texture is a sensory perception of our environment, much more subliminal than color or form. During the winter, the garden loses much of its bright color and leafy abundance, so the texture of winter plants becomes much more apparent. When skies are clear, the bright, glittering winter light accentuates the textures in the landscape. Because the angle of the winter sun is low, it reflects light on the glossy foliage of large-leaved evergreens like hollies and laurels, and the shining bark of ornamental trees.

Whether peeling, patchy, shiny or dull, bark is an asset. Botanists have classified bark into 18 different types, including scaly, peeling, flaking, fissured, corky, cracked, and spiny, to name a few. Trees with outstanding peeling bark include the Paperbark maple, River birch, Paper birch, and Shagbark hickory.

Sargent cherry (below) is a stunner with its glossy, burgundy striped bark. Other trees with shiny, colorful bark include Japanese maples and the Prairiefire crabapple.

Stewartias (below) and Kousa dogwoods display patchy bark in camouflage colors. These ornamental trees look best sited against a backdrop of evergreens, which will help to show off their interesting bark.

Evergreen trees and shrubs provide textures with their leaves and needles, and planting evergreens with contrasting textures creates interesting compositions. The large smooth leaves of a rhododendron can be set off with the ferny foliage of Siberian cypress and the fine texture of a boxwood. The soft long needles of an Austrian pine look great next to the shiny, spiky leaves of a blue holly.

Evergreen groundcovers add texture at ground level and perk up the garden when the lawn has turned to a depressing brown. Excellent groundcovers for winter interest include broadleaf evergreens such as pachysandra, vinca, euonymous, or gaultheria, and low-growing conifers such as ‘Nana’ or ‘Blue Star’ junipers.

Although many gardeners like to deadhead spent flowers in the fall, dried blooms and seedheads of sedums, astilbes, black-eyed susans and ornamental grasses enrich the winter landscape. The dried flowers of hydrangeas, pieris and leucothoe also add a nice texture to the garden, and look particularly beautiful when dusted with snow.

Berries, fruits and hips are like exclamation points in the landscape. The fruits of a hawthorn tree, the berries of cotoneasters, hollies and junipers, or the hips of a climbing rose add a delightful texture, especially when covered with frost.

Texture in the garden is most visible and effective when seen in contrast: lustrous with dull, prickly with smooth, ribbed with flat, feathery with broad, needled with flat. As the “set designer” of your garden, you can create a beautiful winter scene with the endless variety of textures exhibited by our trees, shrubs and herbaceous plants.

The Blazing Beauty of 'Midwinter Fire'

I have always admired bloodtwig dogwood (Cornus sanguinea) for its colorful contribution to the winter garden. During a recent visit to Tower Hill, I fell in love with a new cultivar of this wonderful plant – ‘Midwinter Fire’. This outstanding ornamental shrub features stems that are yellow at the base, igniting to shades of coral and culminating to fiery orange-red at the tips. Planted as a formal hedge with small boxwood at its feet in the new winter garden courtyard at Tower Hill, it was absolutely stunning.

This shrub is a plant for all seasons, with oval medium-green leaves, clusters of tiny white flowers in late spring, dark purple berries in summer, and golden autumn foliage. It grows to 5’ tall and 6’ wide, and looks great backed by dark green shrubs. For more information about growing and caring for bloodtwig dogwoods, please see our previous blog article.

‘Midwinter Fire’ makes a spectacular container plant surrounded by snowdrops and black mondo grass.

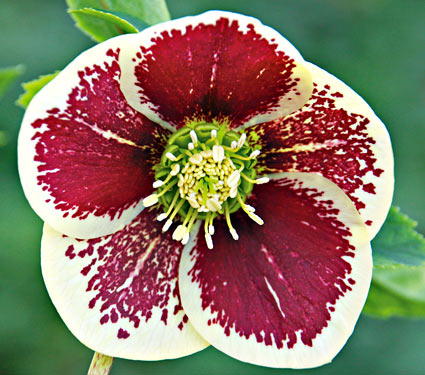
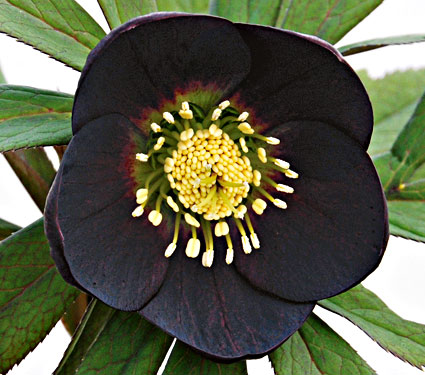
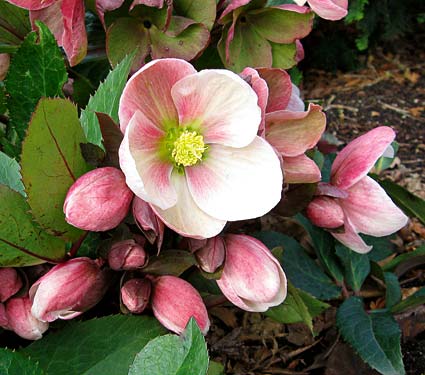
Dazzling Hellebores for 2013

Hellebores have fascinated me ever since I saw huge swaths of them blooming in a Washington, DC botanic garden 12 years ago. I started with a few plants in one garden bed, and as they faithfully returned year after year, I added more varieties, began dividing my own plants, and growing on seedlings in nursery beds. At this time of year, though, I realize that I just don't have enough of these amazing winter bloomers.

As I scouted the websites for new plants, I thought that I would share with you some of the dazzling varieties available to gardeners in 2013.

From Bluestone Perennials: Harlequin Gem and Amber Gem

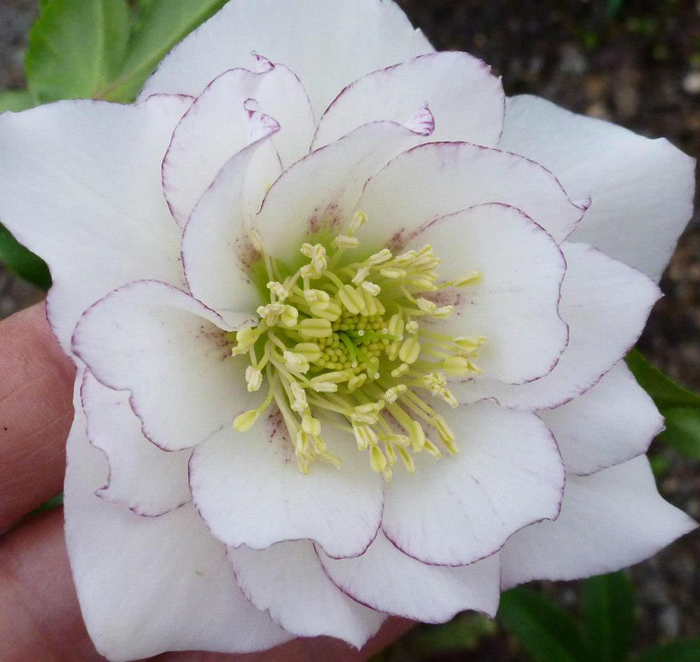
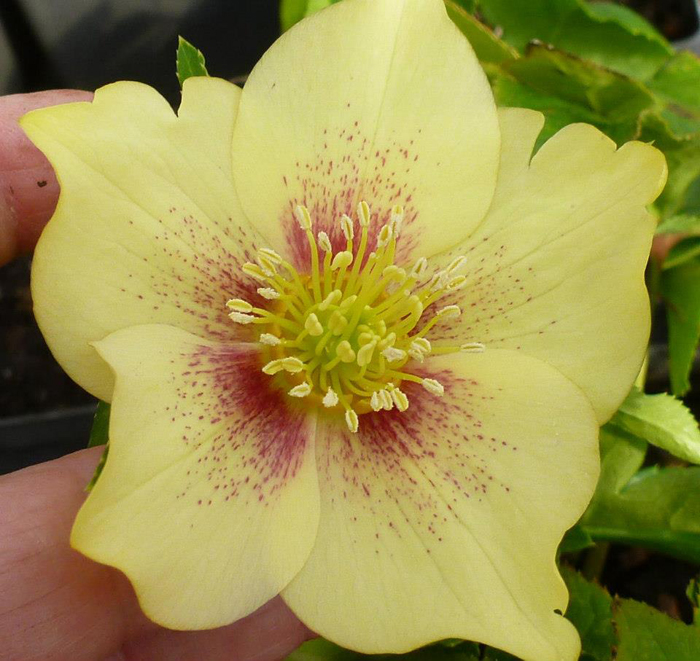
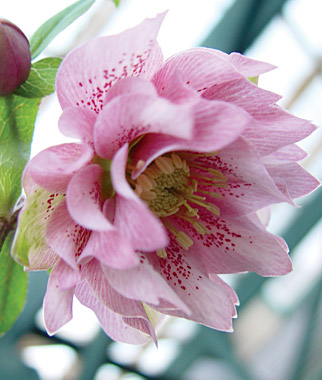
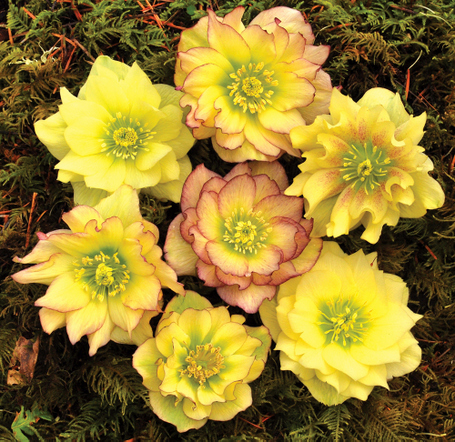
From Pine Knot Farms: Pine Knot Pink, Double White with Pink Edging, Yellow Picottee

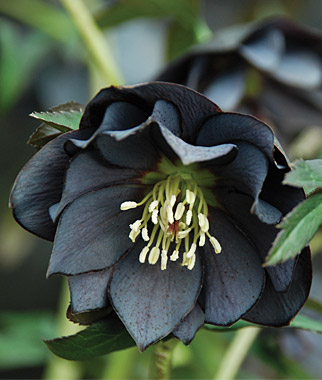
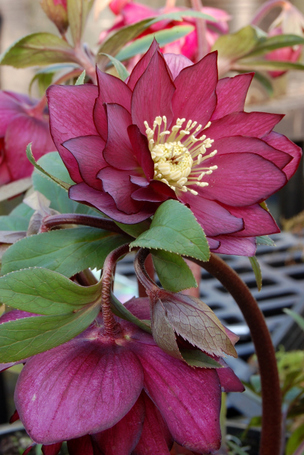
From Burpee: Onyx Odyssey, Phoebe and Stained Glass

From Arrowhead Alpines:  Potter's Wheel  From Plant Delights:  Golden Lotus, Red Sapphire

From White Flower Farm: Winter Thriller 'Ice Follies', Nite Coaster, Pink Frost

Planning an Enchanting Winter Garden

For those of us living in Massachusetts, the winter garden begins in November, when most trees drop their leaves, and persists until almost the end of April, when the majority of trees leaf out again. We view our winter landscape for five months out of each year.

Winter is the perfect season to study your garden and plan its future, because the garden is at its simplest and starkest.

Jot down what you like and what is missing, and note changes to make in the spring. Start with the plantings near the house. Look at the views from your windows. Use a camera to record your views and thoughts.

What makes winter unique from other seasons?

When you are planning for winter, think of yourself as a set designer. Unlike spring and summer, when the garden goes through many scene changes, the winter stage is not going to change rapidly. The overall composition is a static one, but it does not have to be boring, as you can see from this winter scene.

Winter sun

The changing light is one of the most wonderful aspects of winter. Bright and glittering when skies are clear, it can soon become dark and brooding with the threat of rain or snow. The angle of the sun in winter is low, and the result is that it picks up and reflects light on glossy leaves and shining bark.

In open, sunny aspects, the light will bounce off large-leaved evergreens like hollies and laurels. In contrast, some areas of the garden will be in deeper shade in winter, as the sun fails to get over a fence or hedge.

On a clear, sunny day, it’s delightful to take a walk through the winter garden. All the evergreens that add quiet beauty to the garden throughout the year become the main focus in winter, when the perennials have vanished underground and the deciduous shrubs and trees have lost their leaves.

ome winter days are unrelentingly gray, and for these, small splashes of color are what is needed: colorful conifers, a mass of snowdrops, or the buds of the ‘Valley Valentine’ pieris pictured here.

Snow and Ice are prominent features of the winter garden.

Snow outlines the filigree of a garden gate, the arching branches of a climbing rose, or the geometric pattern of a porch lattice, adding intricate patterns to the winter landscape. The delicate textures of shrubs and perennials are highlighted with a sprinkling of snow.

Frost has a magical effect on the garden, altering the appearance of foliage, stems and fruits. Dried seedheads take on an ethereal quality. The sharp edges of frost highlight the leaves of an azalea, bring these wild strawberry leaves into crisp definition, and make berries shimmer in the sunlight.

Where should you situate the plants for winter interest?

Front gardens are particularly well suited to winter plantings. Plants can be observed at close quarters and scents appreciated by everyone coming and going from the house.The house wall often provides extra protection for tender shrubs, and eagerly awaited little bulbs can be enjoyed just as soon as they emerge.

You will want to plant late winter bloomers in entry areas where you will pass them frequently or see them from your window as their charming blossoms signal the beginning of spring.

Through the window

The view from the windows of the house keeps you in touch with your garden at all times of the year, but especially in the winter months, often providing the only picture of the garden during bad weather. Careful placing of plants and objects results in a changing scene as winter advances. Views from upstairs windows will show aspects of the garden not seen at ground level. Are there rooms in the house that you use more in the winter than in the summer? Create a lovely winter view by choosing plants with four-season interest.

Beautiful Bold Bergenia

Plants with “multiple seasons of interest” are all the rage in gardening circles, and for me, Bergenias fit the bill. Most Bergenias are evergreen perennials that remain attractive all year. Their rounded, bold leaves set off the feathery foliage of ferns and conifers, the slender leaves of iris, or the small oval leaves of boxwood.

As cooler weather sets in, the leaves develop rich winter coloring, ranging from purple to maroon, crimson, bronze and even beet red. Popular in Europe, these valuable plants have been largely neglected by American gardeners. If you want to add a lush, elegant, easy-care plant to your garden this spring, look for a Bergenia.

Bergenias are native to central Asia, from Afghanistan to China and the Himalayas, and belong to the Saxifrage family – closely related to Heucheras, Astilbes, Tiarellas, Rodgersias and Mukdenias. Most members of the Saxifrage family have a flower cluster held well above their basal whorl of leaves, and many grow in rocky places, hence the scientific name which means “stone breaker”. Bergenias were named in honor of the 18th century botanist Karl August von Bergen. Like other garden plants, Bergenias have inherited colorful common names that illustrate their traits: “elephant ears” for the shape of their leaves, and “pigsqueaks” for the sound that you get when you rub their leaves with your fingers.

There are ten different species of Bergenia with variations in plant height and flower colors. I grow the most popular species – Bergenia cordifolia, with its heart-shaped leaves. The plants are about 18” tall, with evergreen foliage that turns a rich burgundy color in fall and winter. In late April, red stalks produce beautiful clusters of bell-shaped pink flowers and the leaves turn to a rich glossy green. In my garden, Bergenia’s large, leathery leaves complement the finely cut maroon foliage of a ‘Crimson Queen’ Japanese maple, a small-leaved boxwood, purple coral bells and pink peonies.

I originally planted three Bergenias, which have slowly multiplied to a drift of about twenty-five. The plants grow from long, tube-like underground roots called rhizomes, and can be divided every 2-3 years to avoid crowding and ensure the best blooms. Mine enjoy a partly shaded, sloped bed, which provides excellent drainage. Other than trimming any tattered leaves in the early spring, and deadheading spent flower stalks, the plants are totally carefree. In general, Bergenias are very cold-hardy, thriving in zones 3-7 in the Eastern U.S. They prefer a somewhat protected location, however, since winter winds will scorch and tear their large evergreen leaves. I have two clumps growing on either side of a low evergreen shrub, and the windward clump always looks more haggard in the spring than the leeward clump.

Although Bergenias are outstanding foliage plants, you can find variations in bloom color from white to ruby red and purple. Interesting varieties include ‘Bressingham White’ (white blooms), ‘Baby Doll’ (baby-pink), ‘Apple Blossom (pale pink with red calyx) and ‘Eroica’ (reddish pink).

For something completely different, you can grow one of the recently introduced variegated cultivars. ‘Tubby Andrews’ is green streaked with gold and cream, while ‘Solar Flare’, is similar to a hosta, with a green center and irregular cream and yellow margins. Both sport dark pink blooms. When the cold weather hits, the foliage of these plants takes on various tints of pinks and reds, creating a real showstopper in the garden.

No matter which Bergenia you choose, you will be rewarded with many seasons of beauty in your garden.

The Longstalk Holly: To Grow It Is to Love It

Plant explorers of the 19th and 20th centuries introduced hundreds of eastern Asian plant species into western cultivation. Many of these plants have become so common in the American landscape, that it is difficult to imagine our gardens without them. Forsythia, weeping cherry trees, Japanese maples, Sargent crabapple and old-fashioned bleeding heart are just of few of the Asian introductions we rely on to create beauty in our gardens. The Star Magnolia, double-file viburnum, and Korean lilac are also valued contributors to North American gardens.

Other introductions are less common, and sometimes inexplicably so. One of these is Ilex pedunculosa, the longstalk holly. Native to China and Japan, this evergreen holly is a large shrub or small tree with a sturdy constitution and graceful beauty. It has a dense, upright branching habit when young that becomes more open with maturity. Plants in the wild reach heights of 30 feet, but 15 feet is typical in garden settings. It responds well to light pruning, making it adaptable to the shrub border.

The smooth, green leaves of longstalk holly are 2-3 inches long and 1 ½ inches wide. They are non-spiny, with a satiny sheen and gently rippled edges that catch the light, adding to the shrub’s distinction. Its most unique feature is the bright red berries that hang from one- to two-inch long slender stalks (pedicles), resembling tiny cherries. These fruits are one-quarter inch in diameter and appear in early fall. They persist on the plant well into winter, until they are eaten by birds and other wildlife. As is common in hollies, both male and female plants are needed in order for the female to set fruit.

Longstalk holly was first grown in North America from seeds planted at the Arnold Arboretum in 1907, under the direction of Charles Sprague Sargent, a plant explorer and the first director of the Arboretum. It has proven to be long-lived and extremely cold tolerant, with some of the original specimens still gracing the Arboretum landscape. It is dependably hardy through Zone 5 and has been documented as surviving temperatures as low as -18 degrees with no damage. Like all hollies, it prefers a well-drained, slightly acidic soil. It thrives in partial shade and has no serious pest or disease problems.

My own longstalk hollies were planted over 15 years ago. They were slow-growing at first, then hit their stride and are now 10-foot tall beauties that add grace and diversity to my shrub border. Their long branches are very supple, and it is amusing to watch squirrels as they try to inch their way along the swaying branches to nibble on the tasty fruits. Towards the end of winter, the only berries left uneaten are at the branch tips, and I have seen birds attempting to jump/fly up to grab a berry on their way down. How glad I am that I planted my longstalk hollies across from my kitchen window, where I can appreciate their year-long beauty and enjoy watching wildlife feasting on their fruits.

Longstalk holly is surprisingly under-used in the home landscape. Its lustrous, wavy leaves add depth and motion to the garden as they catch the light of the sun. Its shiny red, dangling berries add unique beauty and provide food for birds and its graceful form adds elegance to the shrub border. In his book, Manual of Woody Landscape Plants, Michael Dirr calls it “the most handsome of the evergreen hollies that can be grown in northern gardens”. Easily grown, disease-free, and beautiful in all seasons, longstalk holly deserves a place in every home garden.

By Joan Butler

Liriope’s Stripes Add Flair and Finesse

One of the benefits of belonging to a garden club is that you are often introduced to new plants. Gardeners are generous folks and enjoy sharing their plants, especially when they are redesigning a garden bed to make room for new acquisitions. Healthy gardens produce a bounty of perennials that need division from time to time, and most gardeners cannot bear to toss their divisions into the compost pile. So, if there is an overflow of a particular plant, babies will be potted up and either donated to the annual plant sale, or brought to a meeting and shared with other members. That is how I came by one of my favorite perennials for the winter garden – variegated liriope.

Sometimes known as lilyturf or monkey grass, liriope is a grass-like flowering perennial from East Asia. It may be either solid green or variegated, and has been widely used in the South as a groundcover due to its hardiness in Zones 6-10. Now that much of Massachusetts is reclassified as Zone 6, it is sure to be used much more widely here as well.

Variegated liriope grows to about 12” tall, with leaves striped in white or gold. It blooms in late summer with lavender, purple or white spikes that are followed by clusters of bluish-black berry-like fruits. With its foliage holding well through the winter, variegated liriope is an ornamental perennial for most of the year.

There are two species of liriope, which dictate its use in the garden. The first is liriope muscari – a clumping perennial with typically lavender or purple blooms. Because it stays where it is planted, liriope muscari is the preferred choice for flower beds or as an edger. It combines beautifully with evergreen shrubs such as boxwoods, and with perennials with contrasting leaf shapes, such as large-leaved hostas and hellebores. Variegated cultivars include ‘Silvery Sunproof’, ‘John Burch’ and ‘Gold Band’.

Liriope spicata is the “running” liriope, a vigorous grower that spreads rapidly by underground rhizomes. It will quickly cover a wide area, making it an excellent groundcover, and can be used to retain soil on slopes and banks. It is tough enough to be planted in dry shade around trees and at the edges of walks or roads. Spicata’s flowers are slightly smaller than muscari’s, and range from white to lavender. ‘Silver Dragon’ is a variegated cultivar whose foliage and lavender flowers light up shady areas.

Variagated liriope is a deer-resistant, low-maintenance perennial. It can be grown in both sun and shade, but looks best in partial shade where its color is not diminished by lack of sunlight or washed out by an overabundance of it. It requires well-drained soil, and is moderately drought tolerant when established. I treat it just like my other perennials: amend the soil with compost when planting, fertilize once a year in the spring, and top off with a layer of mulch to retain moisture. Since the foliage stays evergreen throughout winter, I trim it off in early spring before new shoots emerge. As the plants grow and mature, they can be dug and divided to increase your supply. This is usually done in the spring, every three years or so, but is not necessary for the health of the plant. However, if you need to make room for a coveted new addition to your garden, variegated liriope divisions are sure to be a welcome gift to friends and neighbors.

Siberian Cypress: A Feathery Carpet for the Winter Garden

Microbiota decussata, commonly known as Siberian cypress, is a relative newcomer to the horticultural scene. It was first discovered in 1921, high above the treeline in the mountain ranges of eastern Siberia. It is native to only this small, remote region. For the next 50 years, the plant remained largely unknown to the Western world, partly due to the political secrecy of the former Soviet Union. It finally entered the horticultural trade in the 1970s, and has become available in mainstream nurseries in the past 20 years.

Microbiota decussata is the lone species in its genus, but is related to other members of the cypress family – junipers, arborvitae, and false cypress. What makes it a really special garden plant to me, though, is its low, spreading form, cold hardiness, and ability to grow in the shade. With long stems that radiate from the plant’s crown, Siberian cypress reaches a height of only 12” but a dazzling spread of 10’ if given the proper growing conditions. Its foliage is soft and feathery, bright green in spring and summer, turning to a bronzy-purple color in the fall and winter.

Siberian cypress is very cold hardy, surviving Zone 3 (-40 degrees F) winters with ease. It grows on a variety of soils, but needs good drainage. Although it tolerates drier soils once established, a mulch of wood chips, bark or pine needles is recommended to keep the root zone cool and moist. The only other maintenance that I perform is to remove dry leaves that become matted in the shrub’s crown in fall and winter. These can lead to yellowing and eventual die-back of the evergreen fronds.

When it was first introduced in the US, Siberian cypress was touted as a groundcover for shade. Since most conifers, especially the low ones, prefer full sun, this was a major selling point. Although Microbiota will grow in full sun, it prefers a lightly shaded position – not dense shade. I planted my first Siberian cypress 18 years ago in one of the most challenging spots in the garden – beneath a grove of Norway and sugar maples and hemlocks. The lack of moisture and sunlight has kept the plant at a modest 24” diameter, but it has survived. Another Microbiota, planted many years later at the foot of my rhododendrons in partial shade and better soil, extends its lush branches to form a gorgeous 8’ wide circle. With no major pests and diseases, and not bothered by deer or voles, Siberian cypress is a shrub that I can easily recommend to others.

Siberian cypress has many uses in the landscape. Although attractive alone, it is stunning in large groupings. Its low stature, wide spread and ferny, layered foliage, make it an ideal groundcover. I particularly like its texture contrast with broadleaf evergreens such as rhododendrons, hollies, pieris and mountain laurels. In the summer, it is a wonderful companion to large hostas. But the time of year that I appreciate it the most is during my winter walks, when I see how much this hardy survivor from Siberia adds to the beauty of my garden.

Hellebore Foetidus: A True Winter Charmer

When I first became interested in hellebores, Hellebore foetidus was not at the top of my acquisition list. After all, who would want to brush by a “stinking hellebore’ in their garden? Luckily, I couldn’t resist a beautiful healthy specimen at the local big box store one day, and the Stinking Hellebore has become one of my favorite perennials to grow and share.

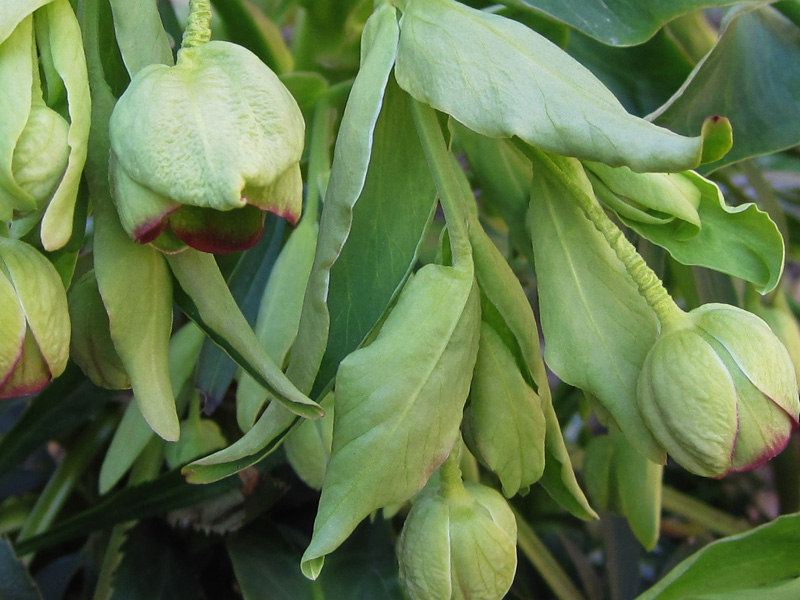
Although fairly common and easy to find in nurseries, Hellebore foetidus is not widespread in home gardens. It is one of the most interesting hellebores to cultivate, however, especially if you live in the Northeast. Few hellebores are as showy during the late fall and winter, when most perennials are chilling underground. Hellebore foetidus stands proud and tall, looking like a miniature rhododendron. The plant is 2’ tall with spidery evergreen foliage that remains a lush dark green throughout winter. Certain varieties also have distinctive red markings on the stems and along the deeply divided leaves. The bear-claw shape of its leaves has produced a second common name – ‘Bear’s Foot’. The distinctive foliage texture makes this hellebore an interesting companion to almost any plant in the garden.
Hellebore foetidus buds detail.jpg

The icing on the cake are the Stinking Hellebore’s chartreuse bell-shaped buds and flowers that perch proudly atop its beautiful foliage. How many plants boast more than 6 months of bloom, starting in November? Just as the rest of the garden hunkers down for the winter, the Stinking Hellebore forms lush pale green buds that open into clusters of l” flowers with chartreuse bracts. In the early spring, these blossoms are covered with early pollinators that help to disperse the seeds.

IMG_6558.JPG

After a couple of years in the garden, I was very excited to find baby hellebores growing in the shade of the mother plants, and transplanted a few to my nursery bed to see how they would grow. Like other caulescent hellebores, the Stinking Hellebore is fairly quick (by hellebore standards) from seed to bloom, often blooming in its second year. Mine grew into stout little plants that first season, and I transplanted them into a new area of the garden. Since that time, I have been careful not to mulch around the hellebore plants, and have impressive colonies of both  Helleborus foetidus and niger in my shade bed. Stinking Hellebore plants can be short-lived, so it’s good to let them set seed to provide a constant supply of new plants.

Helleborus foetidus prefers woodland conditions with deep, fertile, moist, humus rich, well-drained soil, and dappled shade. The species is, however, drought tolerant once established. Plants should be shielded from winter winds. Stinking Hellebore has no serious insect or disease problems and all parts of the plant are poisonous, so it is not bothered by deer or voles. And what of the smell? I have found the plants to have a mildly unpleasant odor when bruised, but the scent of the flowers does not deter me from cutting them for a vase. I just don’t keep them on my bedside table.

Hellebore foetidus has many uses in the landscape. With its intriguing, finely cut, dark green foliage, it makes an interesting and nearly evergreen groundcover for average to dry shade. It is also impressive as a single specimen when given plenty of sun. I grow mine in two partly shaded entry gardens with other hellebores, variagated liriope, leucothoe ‘rainbow’ and hostas, where its distinctive form, texture and bloom welcome visitors all through the year.

Hellebore 'Snow Bunting' is Sure to Please

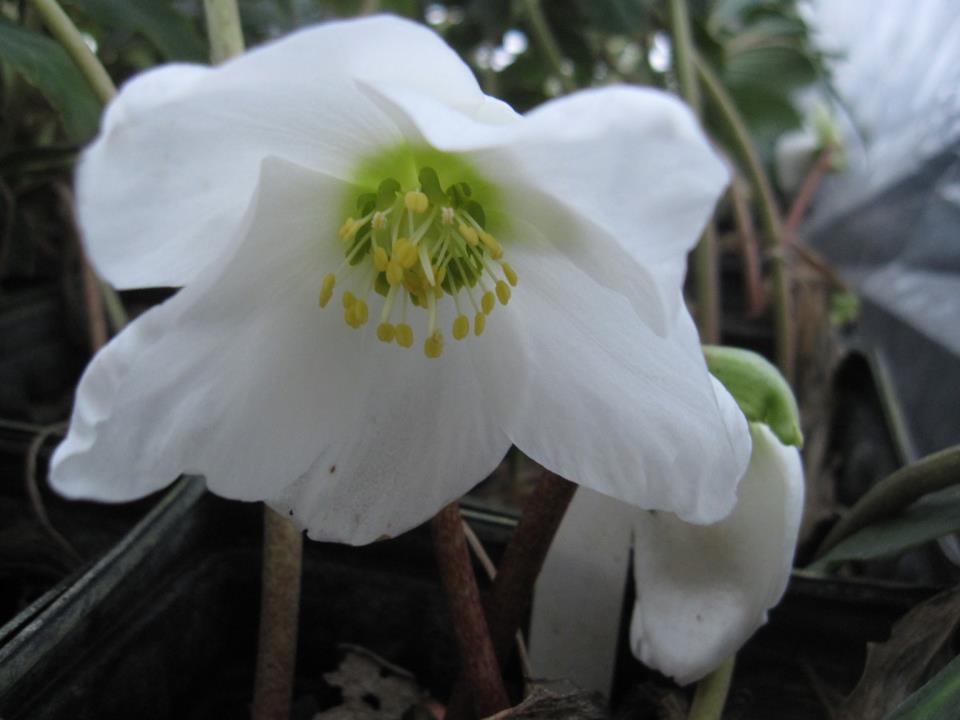
Hellebore 'Snow Bunting' is one of my favorites - an early bloomer in my Zone 5 garden. Its buds begin poking out of the ground in early December, and depending on the severity of the winter, will open in February or March.

This hellebore is an unusual plant from the esteemed Yokoyama Nursery in Japan, a difficult to produce hybrid between H. niger and H. x hybridus.

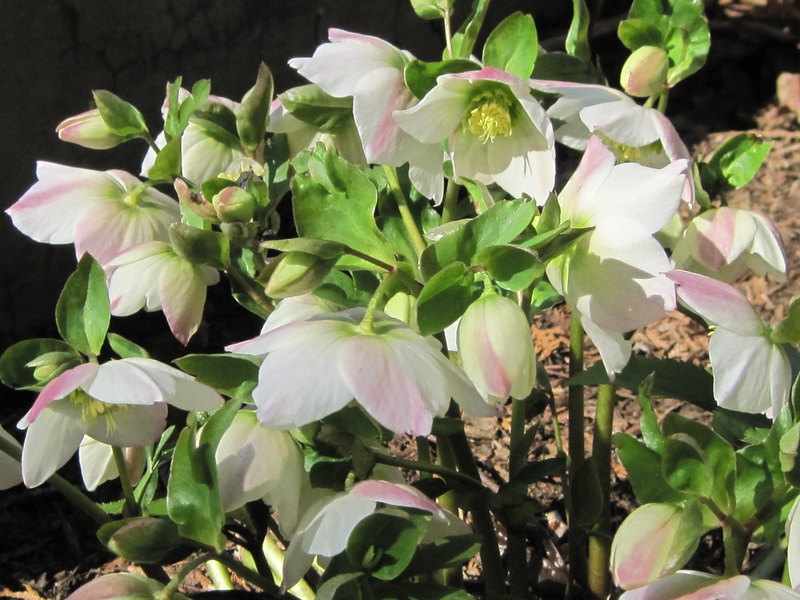
Each plant produces a beautiful bouquet of pure white, outward-facing flowers that last for months, turning a soft light green as they age. A lovely sight!

IMG_1858.JPG


New Hellebore Cultivar Blooms Early

New varieties of hellebores continue to be introduced. Thanks to the busy German breeder Hueger, a new cultivar of Helleborus niger has been introduced which blooms as early as Thanksgiving. It is an outstanding bloomer, with a great display of 2-3” pristine white single rose flowers by mid December. This compact new cultivar, growing to  roughly 12” x 12”,  is being marketed under the name Helleborus ‘HGC Jacob’. (HGC stands for Helleborus Gold Collection). It is hardy in zones 5-9.

Snowdrops Carpet the Early Spring Garden

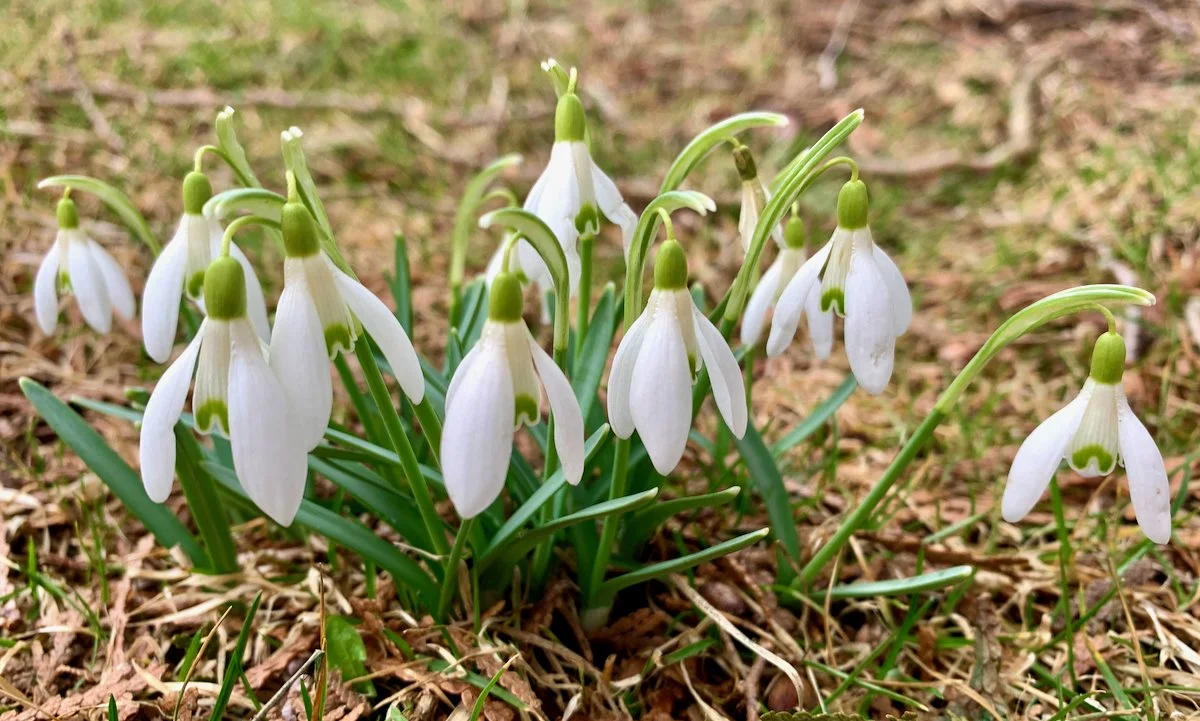
Few flowers are more appreciated than the first blossoms of spring. One of the earliest flowers is the diminutive snowdrop, usually blooming several weeks before crocuses appear. Often emerging out of a blanket of snow, the aptly named snowdrop flower resembles three drops of milk hanging from a stem. Its Latin name, Galanthus, means “milk-white flowers.” The plants grow to a height of 4-8”, and exhibit beautiful bright white blossoms punctuated with a bright green spots, and a faint honey fragrance.

Although there are more than 70 varieties of snowdrops in cultivation, only two types are widely grown – the common snowdrop, Galanthus nivalis, and the Giant Snowdrop, Galanthus elwesii. The plants are native to Europe and the Mid-East, from the Pyrenees north to Poland and east to Russia, Turkey and Syria. They have become wildly popular in the British Isles, where there are entire gardens dedicated to snowdrop cultivation. Scotland hosted its first Snowdrop Festival in 2007 with 60 gardens participating. The most famous snowdrop garden is Colsbourne Park in the English Cotswolds, the ancestral home of plant hunter Henry John Elwes, who collected the elwessi hybrids in Turkey and introduced them into modern cultivation in the 1870s.

Galantophiles are fascinated by the subtle variations between cultivars, from the double flowers of G. ‘Flore Pleno’, to the gold dashes of ‘Lutescens”, to the broad, shiny leaves of G. ikariae, or the rare autumn blooms of G. reginae-olgae.

Snowdrops grow best in areas with a cool winter, and are hardy in zones 3-7. They take full sun to part shade, and can be grown under deciduous trees or shrubs because they will bloom before the trees leaf out in the spring. They prefer moist, humus-rich soil with good drainage, but can also tolerate an area with dry shade once established. After the plants finish flowering, their foliage should be allowed to fully die down on its own. Like other members of the Amaryllis family, snowdrops are avoided by deer and voles.

Snowdrops grow from tiny bulbs, which should be planted in the garden in fall with crocuses, daffodils, and other spring-blooming bulbs. Purchased bulbs must not be allowed to dry out, so it is best to plant them immediately or soak them overnight prior to planting. Like other small bulbs, snowdrops look best planted in clumps, so plant them 2-3” apart and 3” deep. Many gardeners recommend planting snowdrops from divided fresh clumps in the spring, after their blooms have faded, but before the foliage turns yellow. If you have any friends that grow snowdrops in their garden, this is the time to ask if they will share their plants with you.

Small size and early bloom makes snowdrops ideal flowers for rock gardens, troughs, raised beds and the edges of garden beds. You will want to plant snowdrops where you will pass them frequently or see them from your window as their charming blossoms signal the beginning of spring. They naturalize freely both by self-seeding and through bulb offsets, and can form beautiful carpets in the lawn, in the shade garden or in the shrub border.

My small collection of snowdrops began when my 8-year old son brought home a blooming clump from his friend’s house. The snowdrops were admired and left in the pot through the summer. At some point the pot was knocked over, and the snowdrops rooted themselves in the mulch under the cedar tree. The following spring they appeared there and next to our pond. Last spring I decided to move them to my circular shade bed in the driveway, because I had read that miniature bulbs can be planted around the bases of hostas. They will bloom before the hosta shoots poke out of the ground, and the emerging hosta leaves will hide the snowdrops’ yellowing foliage in May. As with any small bulbs, however, you never manage to remove the whole clump, so this year I have snowdrops popping up in a number of places. I can barely wait until I am 80 and the entire garden is white with snowdrop blooms in early March.

To start your own collection of Galanthus varieties, visit brentandbeckybulbs.com and vanengelen.com.

Witch Hazel Cures Spring Fever

At this time of year, when I am yearning for any sign of spring, I get the boost I need from the winter blooms of witch hazel. Their ribbon-like flowers in shades of yellows, oranges and reds fill the winter air with a clean, sweet scent that is most welcome to this winter-weary New Englander.

Witch hazel (Hamemelis) grows as a large shrub or a multi-trunked small tree, with deeply ribbed green summer foliage and an open shape that requires little pruning. Its unique flowers resemble shreds of crepe paper, with four dainty, twisted petals radiating out from the center. Individual petals are thin and can be up to three-quarter inch long; flowers are typically one-half to two inches in diameter and can last for several weeks. Witch hazel has an architectural branch structure and glorious fall foliage colors. But, its most outstanding attributes are its wonderful fragrance and its unusual bloom time: from mid-fall to late winter, a time when most plants in temperate gardens are in a state of dormancy.

Vernal witch hazel (H. vernalis) and autumn witch hazel (H. virginiana) are native to North America. Vernal witch hazel, hardy to Zone 3, is a spreading, suckering shrub that reaches heights of around ten feet. It flowers the earliest of all the winter-flowering types. Bloom time is in January-February/March, a time when little else is going on in the garden. Its fragrant flowers have red-tinged yellow petals that curl up on very cold days to avoid freeze damage; in this way, blossoms can last 3-4 weeks. Flowers are small, but plentiful. Fall leaf color is an outstanding yellow that can often persist for 2-3 weeks.

Autumn witch hazel, hardy to Zone 4, is a common understory tree/shrub in the eastern US. Witch hazel extract is made from the bark of its young stems and roots. It can reach heights of 30 feet with a spread of over 15 feet. (For smaller gardens, H.'Little Suzie' grows to a height of 5-6 feet.)  Autumn witch hazel has large, yellow flowers with four crumpled and crimped petals. It blooms in late October-November, a time when most deciduous shrubs already have had their last hurrah. Its fall leaf color is a brilliant yellow and occurs concurrently with the yellow flowers to create a beacon of gold in the landscape. Its sweet scent spreads a great distance in the crisp autumn air.

The Asian species of witch hazel (H. japonica from Japan and H. mollis from China) have been crossed by hybridizers to create spectacular cultivars, termed H. x intermedia. All bloom in late winter/early spring, after the vernal witch hazel. These vase-shaped shrubs are hardy to Zone 5, grow 15-20 feet high, and have a wide range of flower color and autumn leaf color. H.'Arnold Promise' is a cultivar introduced by the Arnold Arboretum. It has large, fragrant yellow flowers, each petal nearly an inch long, and a bloom time that is among the latest of all witch hazels. H. 'Diane' is considered the reddest of the red-flowering types. 

H.'Jelena' offers flowers with inch-long petals that are red at the base, orange in the middle and yellow at the tips. The overall effect from a distance is of glowing copper.  Fall leaf color is rich orange-red. The number of H. x intermedia cultivars is staggering – your main problem will be in settling on which one to choose!

Witch hazel is easy to grow. It does well in most garden situations, but grows best in conditions that are similar to its native woodland habitat: slightly acidic organic soil that is well-drained but not overly dry, and morning sun or dappled sunshine. It will also do well in full sun in the northern reaches of its range.  In the home garden, witch hazel can be planted as a specimen or as part of a shrub border. It should be sited to take advantage of its unique features: its brilliant autumn leaf color, which ranges from bright yellow to orange to red, its curled and crimped blossoms,which are stunning when backlit by the soft light of the winter sun, and its fragrance, which perfumes the cold air of a mid-fall or late winter day.

Numerous witch hazel cultivars are currently in bloom at Tower Hill Botanic Garden in Boylston, MA. You can purchase your own witch hazel at many local nurseries and through mail-order sources such as RareFind Nursery (www.rarefindnursery.com).

By Joan Butler